Tuile Cookie Leaves
This post may contain affiliate links. As an Amazon Associate, I earn from qualifying purchases. See my Affiliate Disclosure .
These crispy, snappy, ultra-thin tuile cookies got their name from the French arched clay roof tiles. Usually, they are served with delicate creamy desserts and mousses to give a bit of texture and contrast.

Table of Contents
Chronicles of Tuiles and Tuileries
In the heart of Paris, nestled between the Louvre and Place de la Concorde, you’ll discover the enchanting Tuileries Garden. It’s fascinating to think that during the Middle Ages, this area was located outside of Paris and served as an artisan district where roof tiles, known as “tuiles” in French, were manufactured. The name “Tuileries” endured long after the royal families purchased and reconstructed their palaces and gardens.
This historic location pays homage to the craftsmanship that produced countless beautiful roof coverings. Whenever I indulge in a tuile cookie, its satisfying crunch echoes through time, connecting me to the rich heritage of this craft.
Why do I like this Recipe
These cookies are really easy to make and baking them takes practically no time. When you find yourself with extra egg whites you can make a quick batch of tuile cookies.
While hot, these tuile cookies can be molded into different three-dimensional shapes.
Grocery list for Tuile Cookies
Special Tools to Use:
- Leaf stencil
Time Required:
5 minutes for prepping
30 minutes for baking (7-8 minutes for each tray)
How to Make Tuile Cookies- Step by Step
Making a Leaf Stencil
Even though making tuile cookies don’t require a stencil, using a stencil gives you the option to make them into desired shapes. Making the leaf stencil by yourself is very fun and engaging.
I start with buying a flexible plastic cutting board, and cut them into 4-inch squares.
Then, I hand-draw oak and aspen leaf designs on the squares and use an exacto knife to precisely cut out the traced shapes, resulting in a personalized stencil for my tuile cookies.
Making Tuile Batter
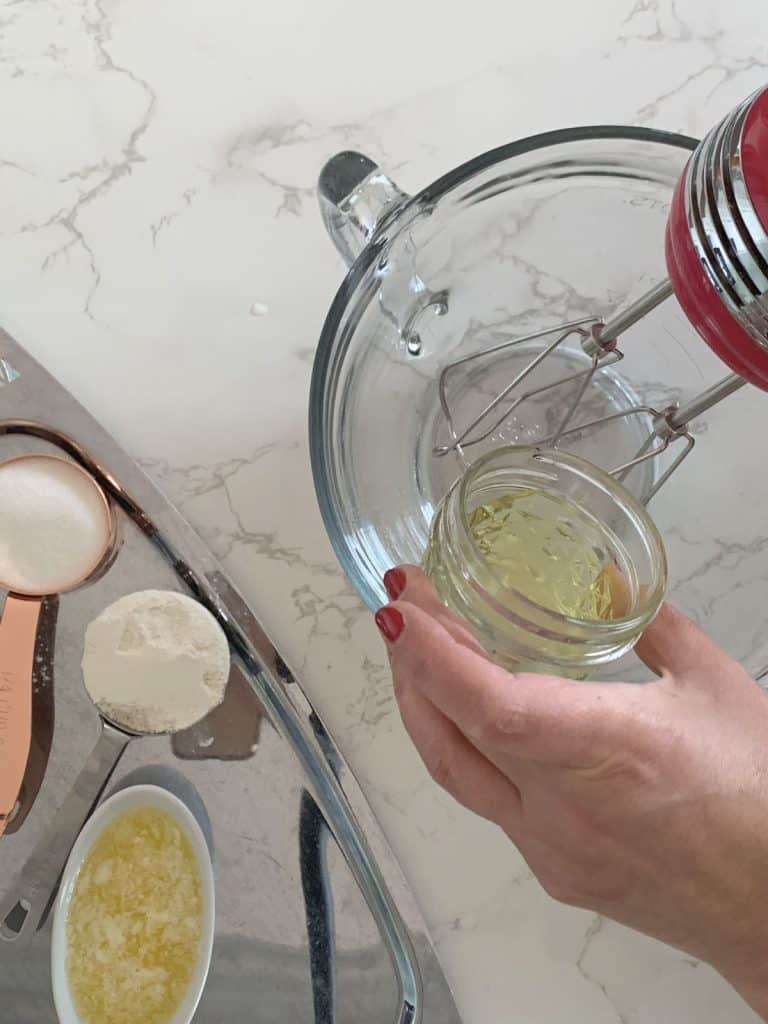
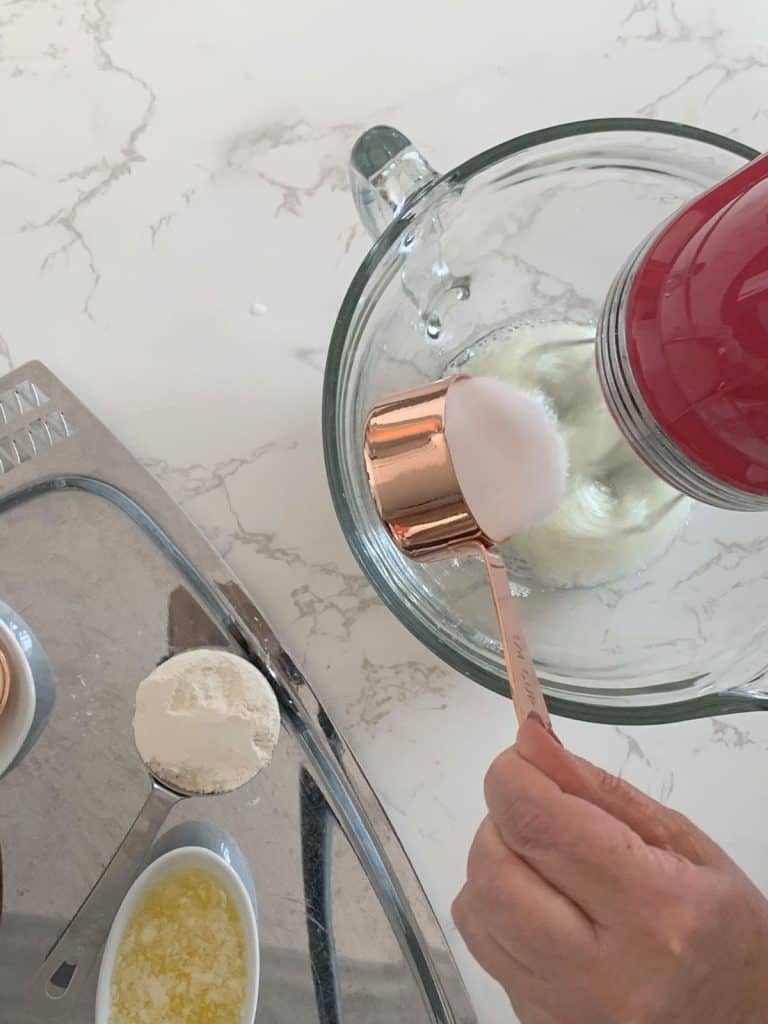
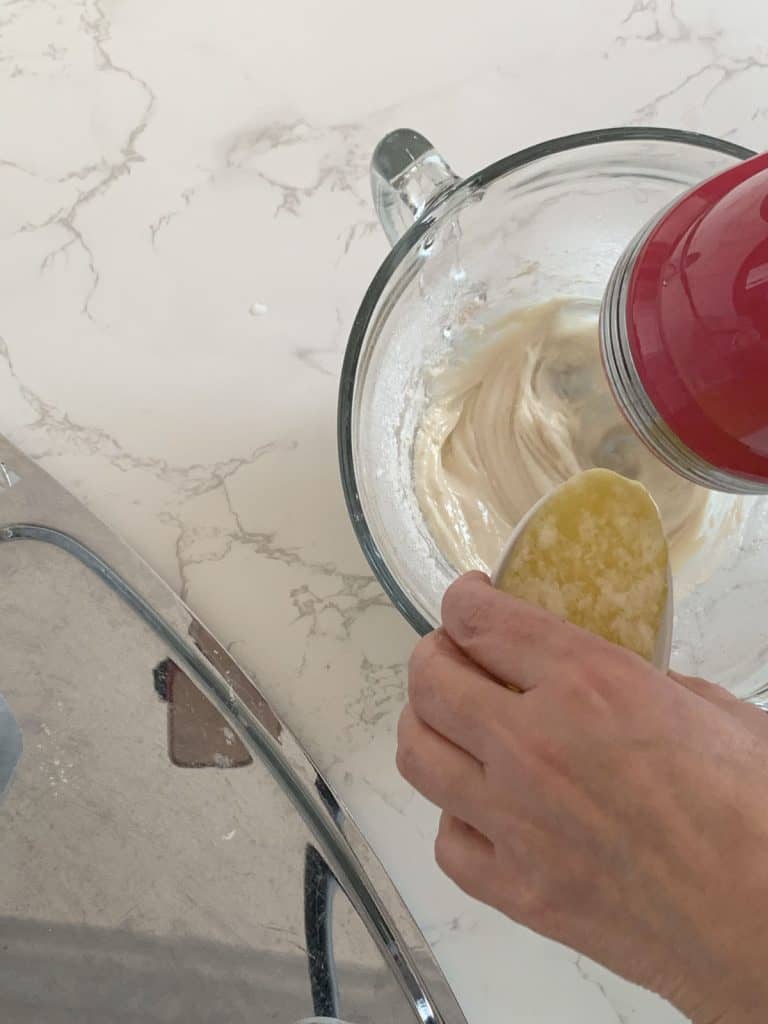
The batter comes together very quickly. Using a hand mixer or just a whisk, beat the egg whites, salt, and sugar until the sugar dissolves a bit and the mixture is frothy. Add the sifted flour all at once and mix to combine. Whisk in the melted butter and vanilla and mix until you have a homogenized batter.
Making the cookies
The process of making cookies are very quick but require a little bit of coordination.
If you want to give 3-dimensional form to your cookies you need to do it while they are hot right out of the oven. You can use a rolling pin, or a half shape pipe to give extra curvature.
Preheat the oven to 350°F.
Turn the sheet pan over so there are no ridges in the way and it’s easy to work the spatula to spread the batter and remove the cookies.
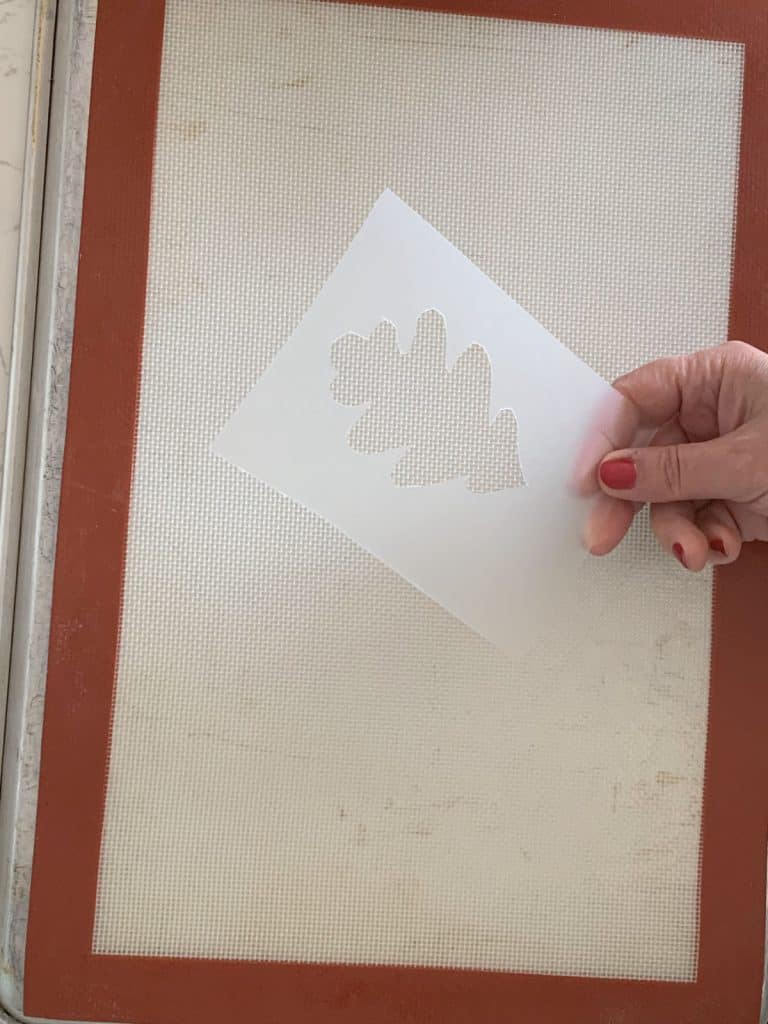


Line with a silicon mat.
Place the stencil on the corner and using a small offset spatula, scoop out a small amount of batter and spread it over the pattern. Scrape any excess. Carefully lift the stencil and move over and repeat until you use all the space.
Bake for 7 minutes. In the meantime, prepare the setup to shape and cool the cookies. Securing the rolling pins, and have a rack for the hot sheet.
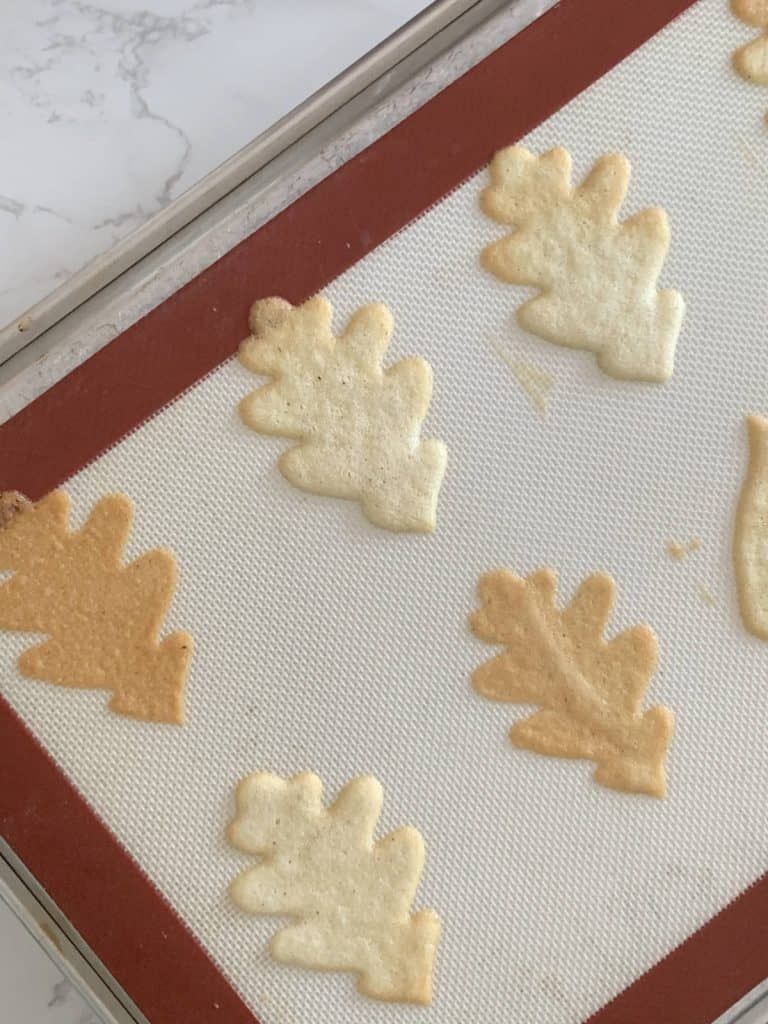
Once you see the edges are brown and the leaves have the desired color, remove them from the oven and place them next to your setup.
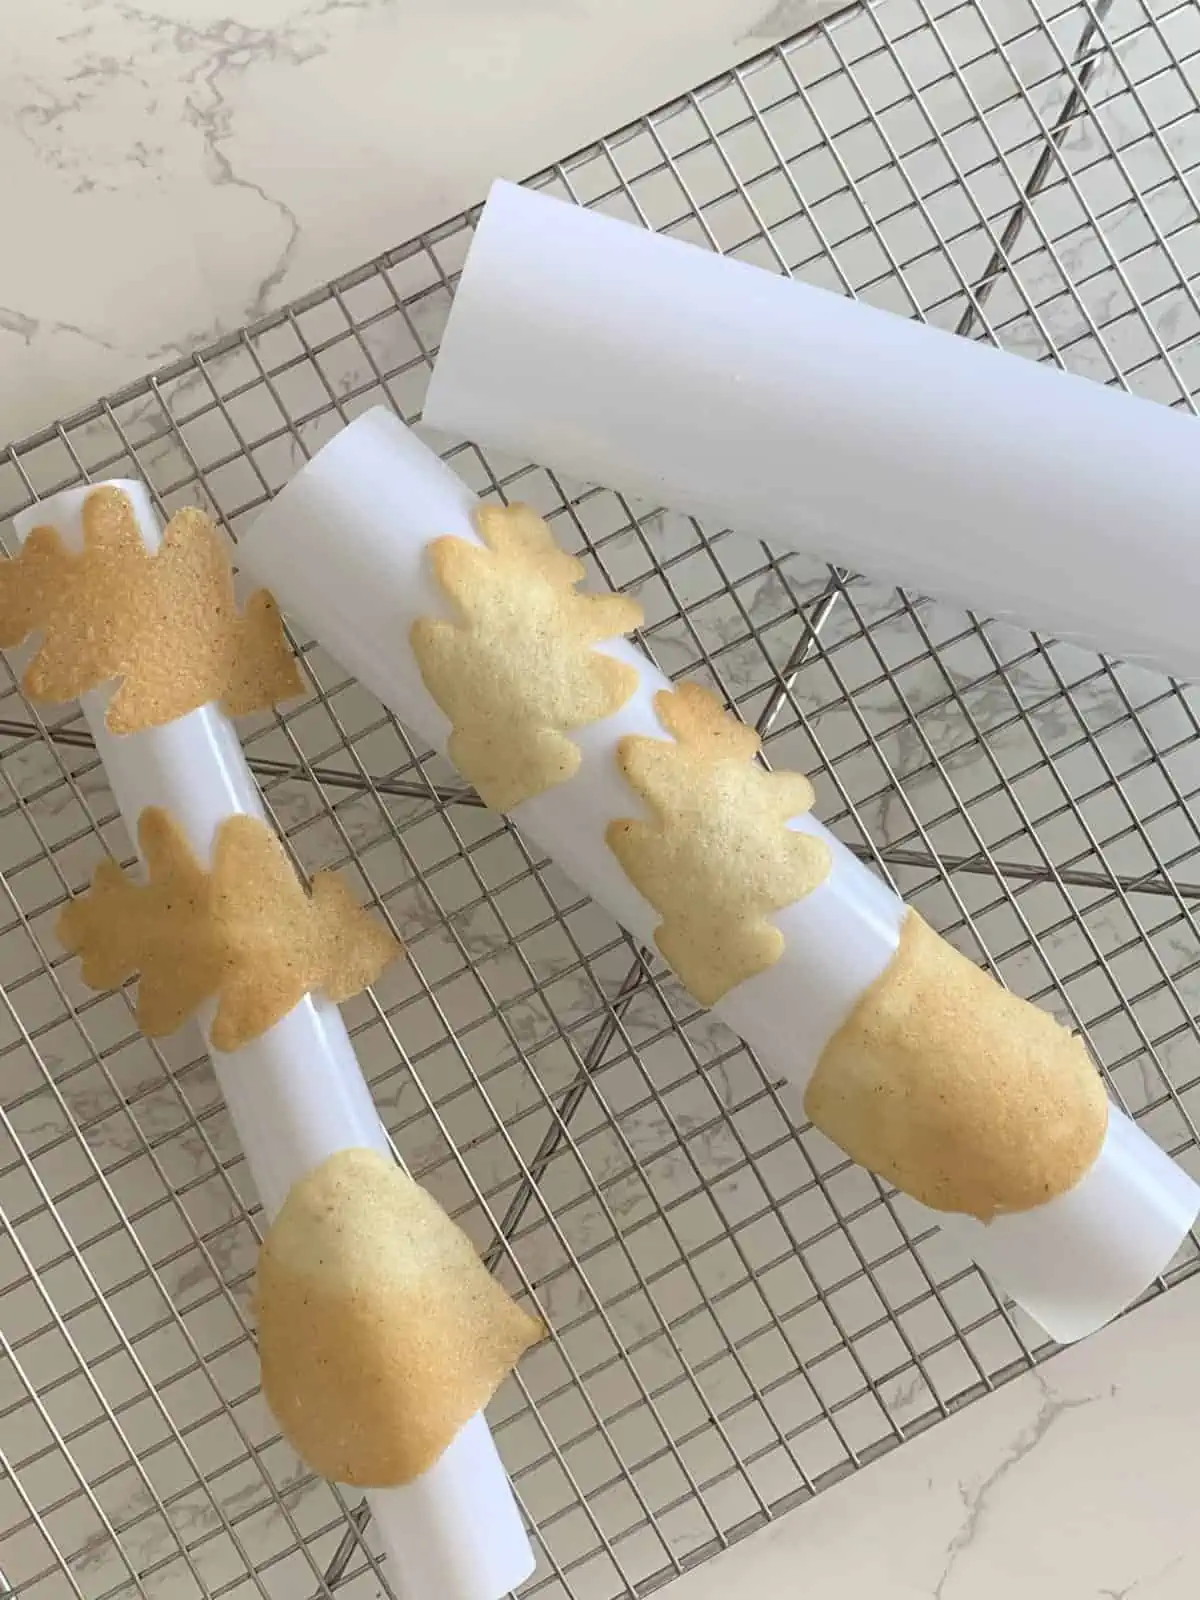
Quickly and carefully, slide the offset spatula under the cookie and drape them over the tubes.
You have very short window until they cool and harden.
Repeat the steps until all the batter is gone.
What to Serve with
- Serve over creamy and soft desserts such as ice cream, mousseline cream, and pot de cream.
- Serve as an accompaniment to cakes such as Buche de Noel cake.
- Serve with coffee or tea alongside with apricot or blackcurrant jam
- Dip in melted chocolate.
Tips and wisdom

Ingredients
- 1 egg white
- 1/4 cup sugar
- 1/4 cup all-purpose flour
- 1/4 cut unsalted butter melted
- 1/4 teaspoon vanila extract
- Pinch Salt
Instructions
- Preheat the oven to 350°F.
- In a bowl, beat the egg whites, salt, and sugar using a hand mixer or whisk until the sugar partially dissolves and the mixture becomes frothy.
- Add the sifted flour all at once and mix until well combined.
- Whisk in the melted butter and vanilla extract, continuing to mix until the batter is smooth and uniform. You want the batter to be soft and spreadable.
- Place a silicon mat on an inverted sheet pan to line it.
- Position the stencil in one corner of the pan. Using a small offset spatula, scoop a small amount of batter and spread it evenly over the stencil. Remove any excess batter.
- Carefully lift the stencil and move it to another section of the pan, repeating the process until you have used all the available space.
- Bake for 7 minutes, while preparing the setup for shaping and cooling the cookies. Secure rolling pins and have a cooling rack ready for the hot sheet.
- Once the edges of the cookies turn brown and the desired color is achieved, remove them from the oven and place them near your setup.
- Swiftly and carefully slide the offset spatula under each cookie, draping them over the tubes to shape and cool. Note that you have a limited time before the cookies harden.
- Repeat the steps until all the batter is used, creating more cookies.