
Authentic Hummus – Creamy Chickpea Dip

This post may contain affiliate links. As an Amazon Associate, I earn from qualifying purchases. See my Affiliate Disclosure .
Hummus is one of those recipes I never get tired of making—or eating. Creamy, silky, and deeply satisfying, this chickpeas dip (garbanzo dip) has been a staple of Middle Eastern tables for centuries. The word hummus literally means chickpeas in Arabic, and the authentic hummus recipe is actually called hummus bi tahini—chickpeas with tahini. For me, this creamy hummus recipe is more than just a spread; it’s the centerpiece of a hummus platter, served with warm pita bread, roasted vegetables, or as part of a larger mezze spread. Whether you make hummus from dried chickpeas or canned, you’ll end up with a homemade garbanzo dip that feels both rustic and refined.
Menu Suggestion: Make It a Meal
Create an unforgettable Middle Eastern feast by pairing this creamy hummus
Table of Contents
What’s Great About This Recipe
Essential Grocery List and Ingredient Notes
Substitutions and Customization
Time Commitment and Prep Tools
Estimated time
Special Tools to Use
Recipe Steps at a Glance
How to Make Authentic Hummus
Step 1: Cooking dry chickpeas
Overnight soaking is typically sufficient, and the cooking time varies based on the age of the dried beans, usually taking anywhere from one to two hours.
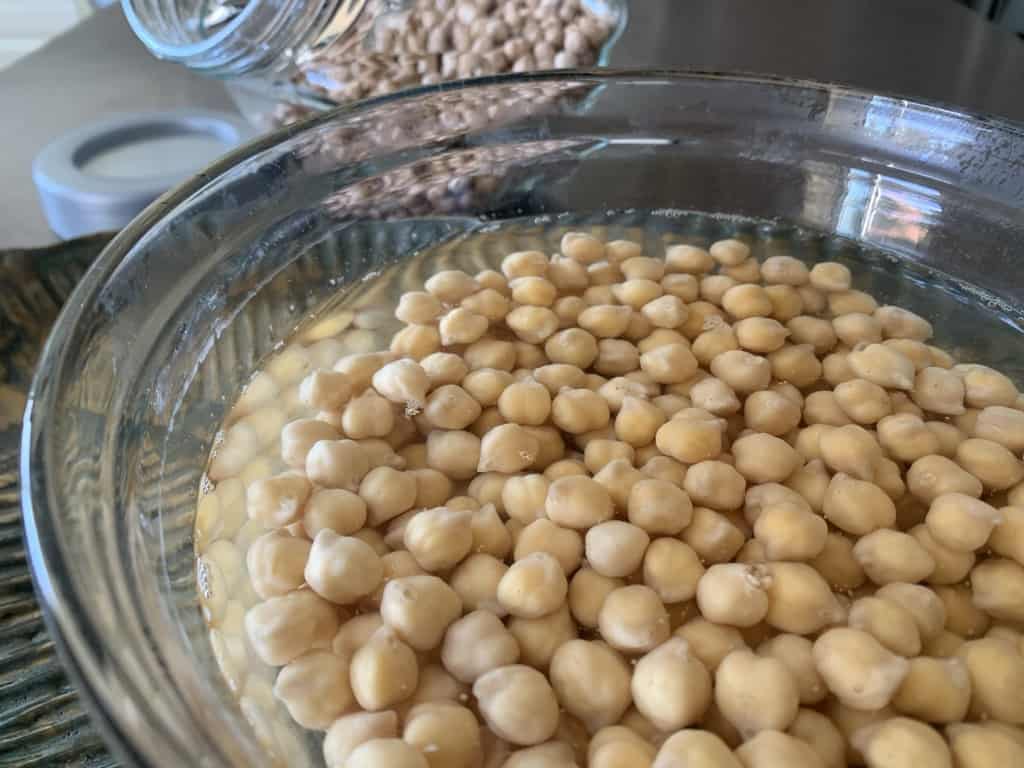
I start by rinsing 1 cup of dried chickpeas and placing them in a large bowl with plenty of room to expand. I cover them with water (at least 2-3 inches above the beans), add 1 tablespoon kosher salt and 1 teaspoon baking soda, then let them soak 8-12 hours (Pic. 1).

Pic. 1 
Pic. 2 Pic. 3

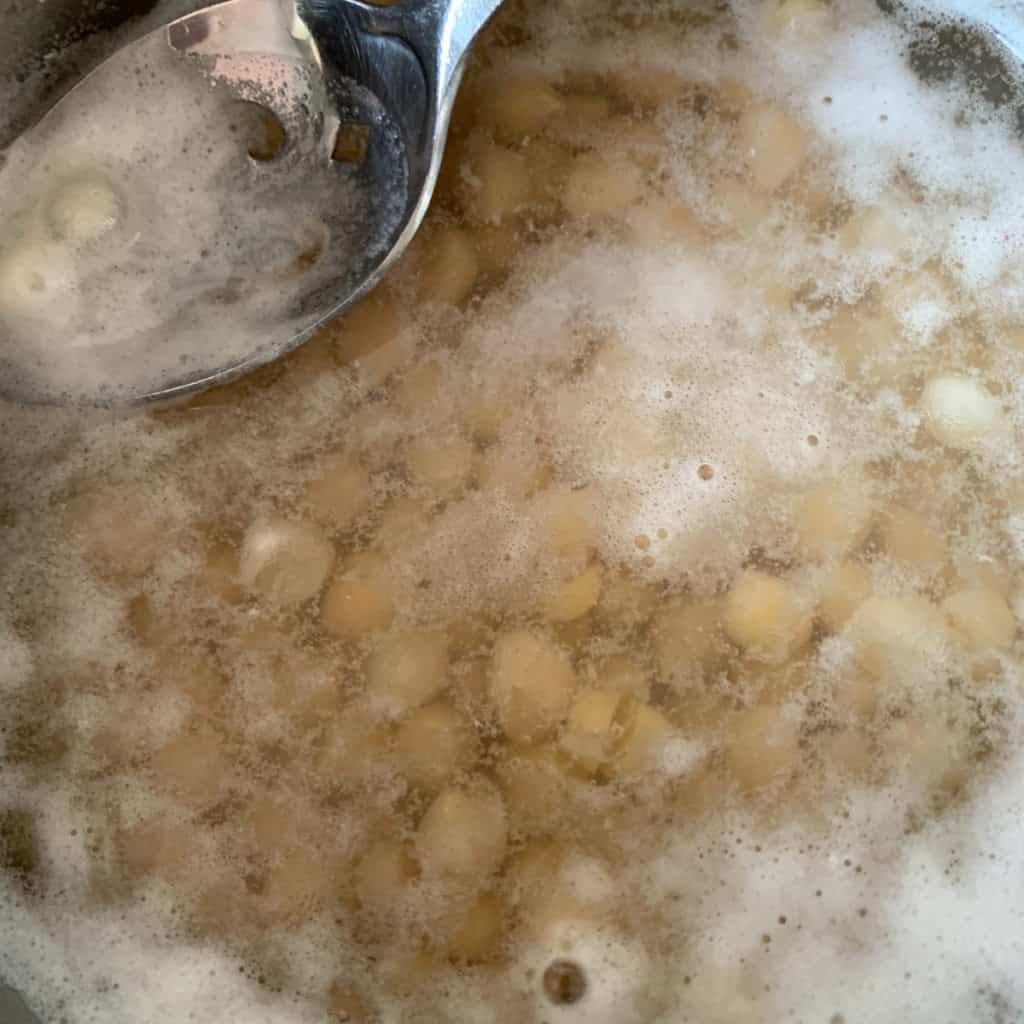
After soaking, when the chickpeas are re-hydrated, I drain, rinse, and transfer them to a pot with fresh water (Pic. 2). When the water boils, I skim off the foam that forms on top – this step is crucial for clean-tasting hummus. I reduce heat and simmer for 1-2 hours until the chickpeas are completely tender and some skins start floating to the surface (Pic. 3).
Check for doneness and add the salt. If the beans are cooked but still retain some firmness, incorporate half a teaspoon of baking soda. This will cause the beans to foam up. Allow the foam to settle, and if you notice more skin rising to the surface, remove it. Continue cooking for another 10 minutes. By this point, they should be ready.
Drain the chickpeas and reserve some of the cooking liquid.
Pro tip: I remove as many skins as possible during cooking for the silkiest texture. One of the secrets to achieving silky hummus is painstakingly removing the skins from the peas one by one. Adding ½ teaspoon baking soda in the last 10 minutes also helps separate more skins and tenderize the chickpeas.
Can I use canned garbanzo beans to make hummus?
You can use canned garbanzo beans as a quick alternative. Drain the beans and give them a quick rinse. Put the beans into a pan and add an equal amount of water and bring it to a boil. Let simmer for about 20-30 minutes. This will help get rid of the metallic taste that canned beans usually have.
Step 2: Creaming the tahini
For hummus, scoop ¼ cup of tahini into a small jar (Pic. 4).

Pic. 4 Pic. 5 Pic. 6
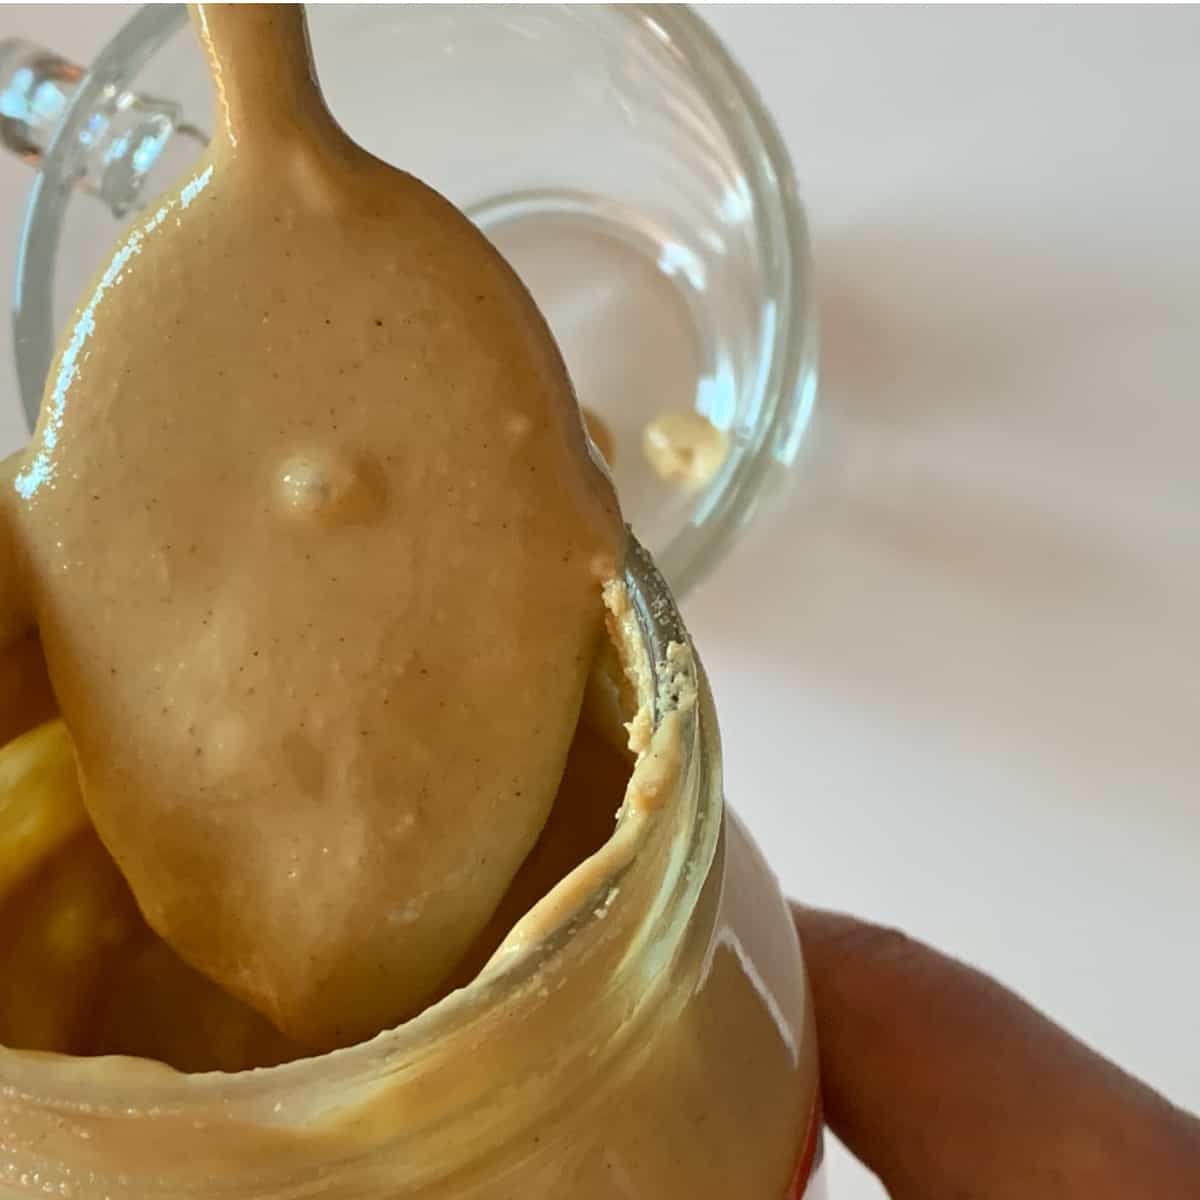
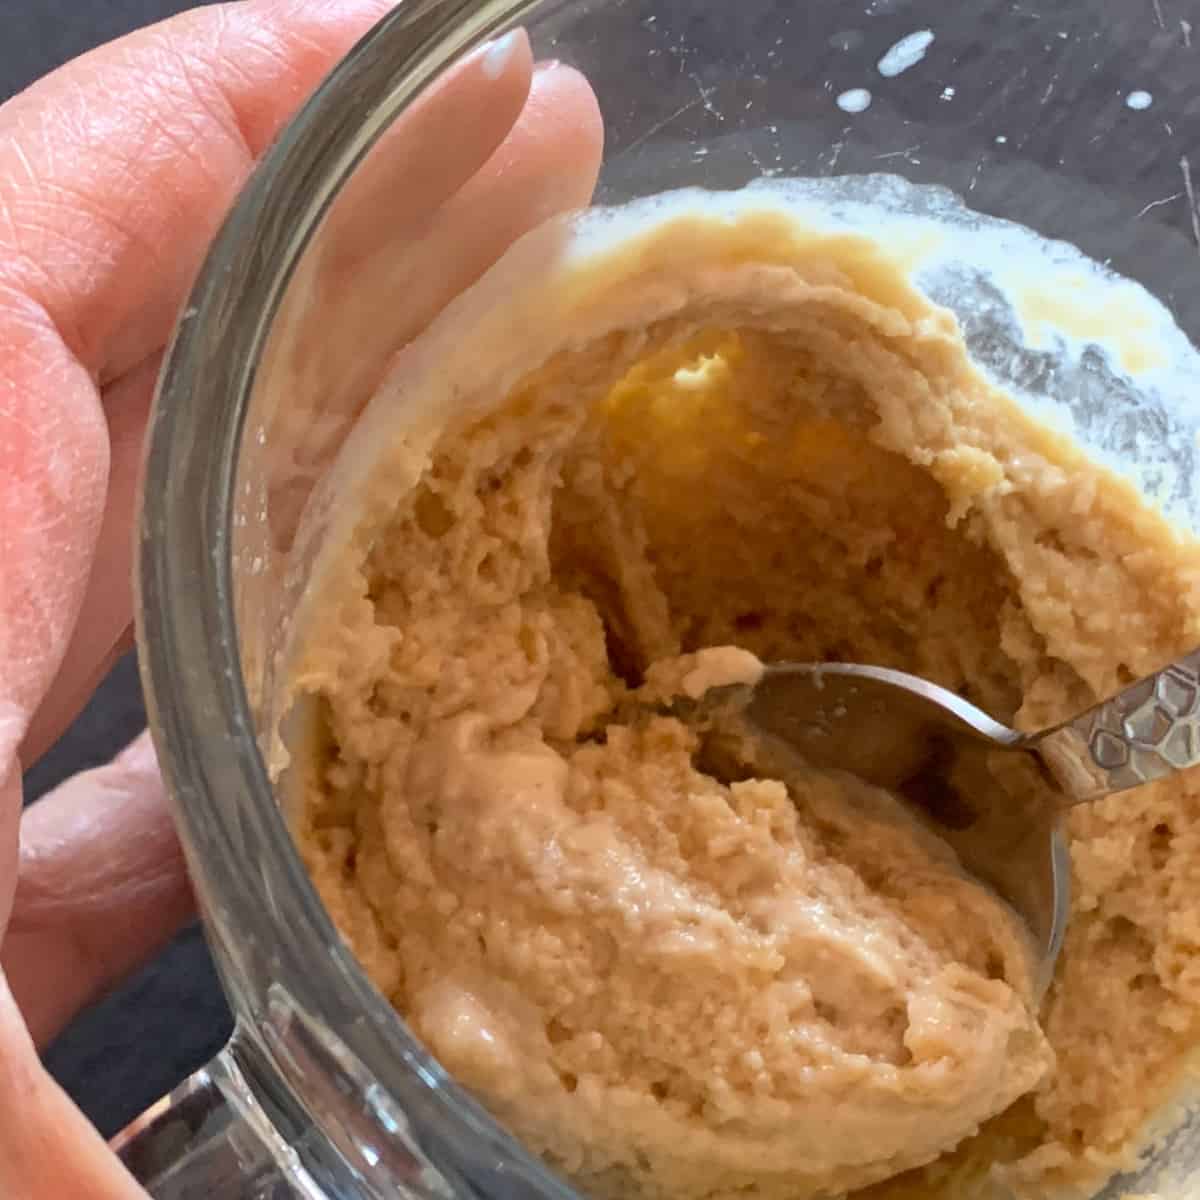
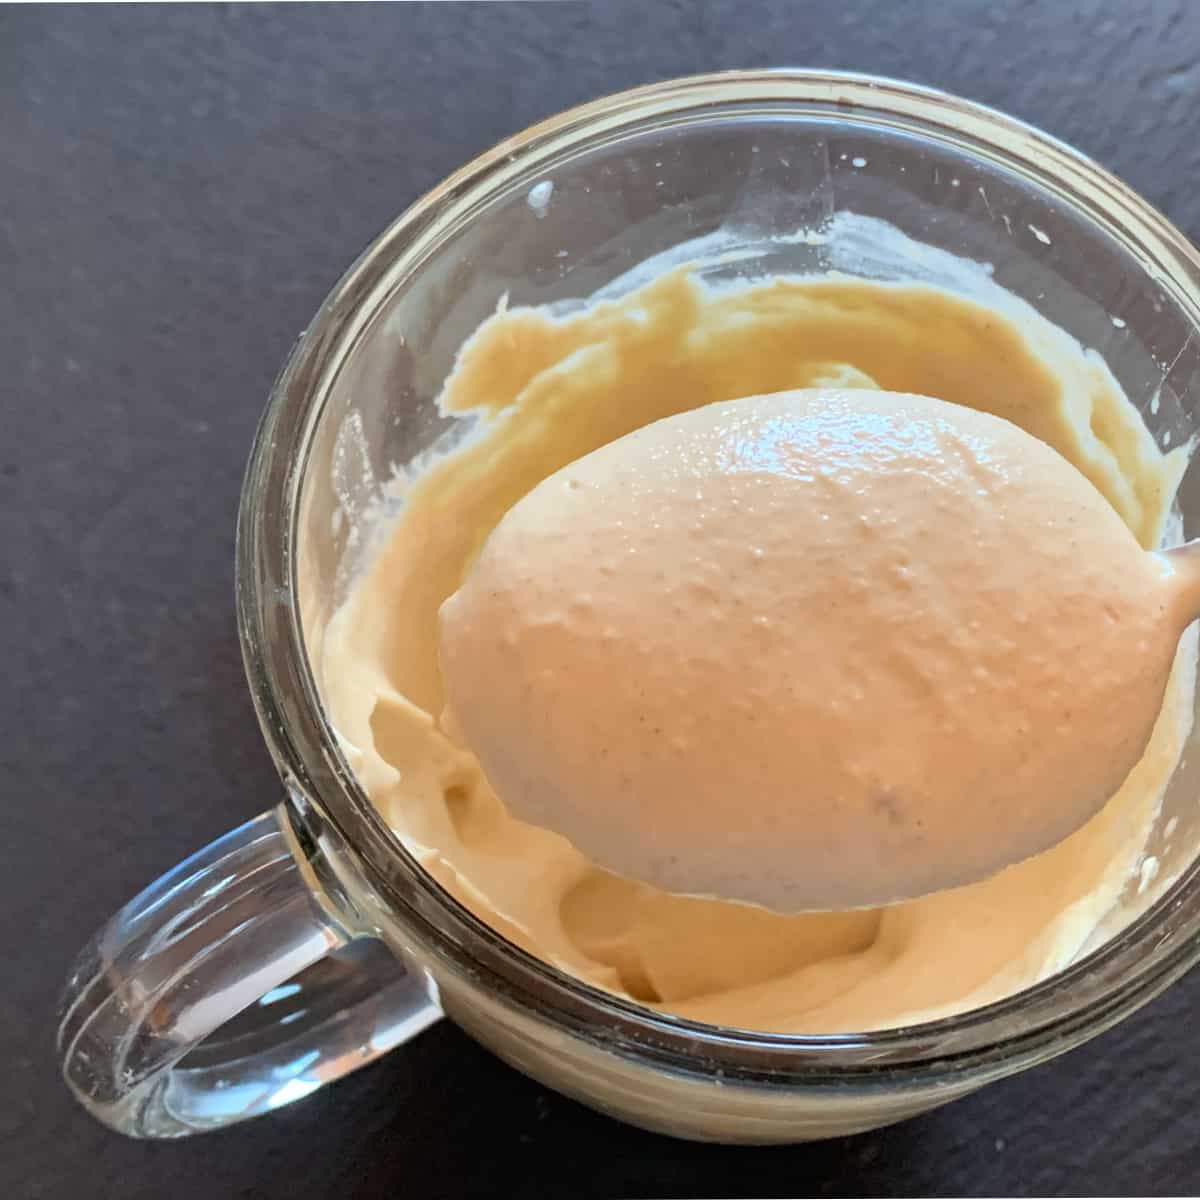
In a small bowl, I whip tahini with a few tablespoons of water using a spoon. At first, the mixture seizes up (Pic. 5), but I keep adding water and whipping until it transforms into a pale, airy cream that’s doubled in volume (Pic. 6). That is what we want: silky and smooth tahini that has volume. This technique is what makes restaurant-quality hummus at home.
What is tahini?
Tahini is a crucial ingredient for achieving smooth, silky, and flavorful hummus. It’s essential to use high-quality tahini, which is made from lightly toasted and pressed sesame seeds. Pure tahini typically has a bright tan color, not brown. You may notice some oil separation with the oil floating on top. Before each use, be sure to thoroughly stir the tahini to evenly mix everything together.
Step 3: Blending the Perfect Base
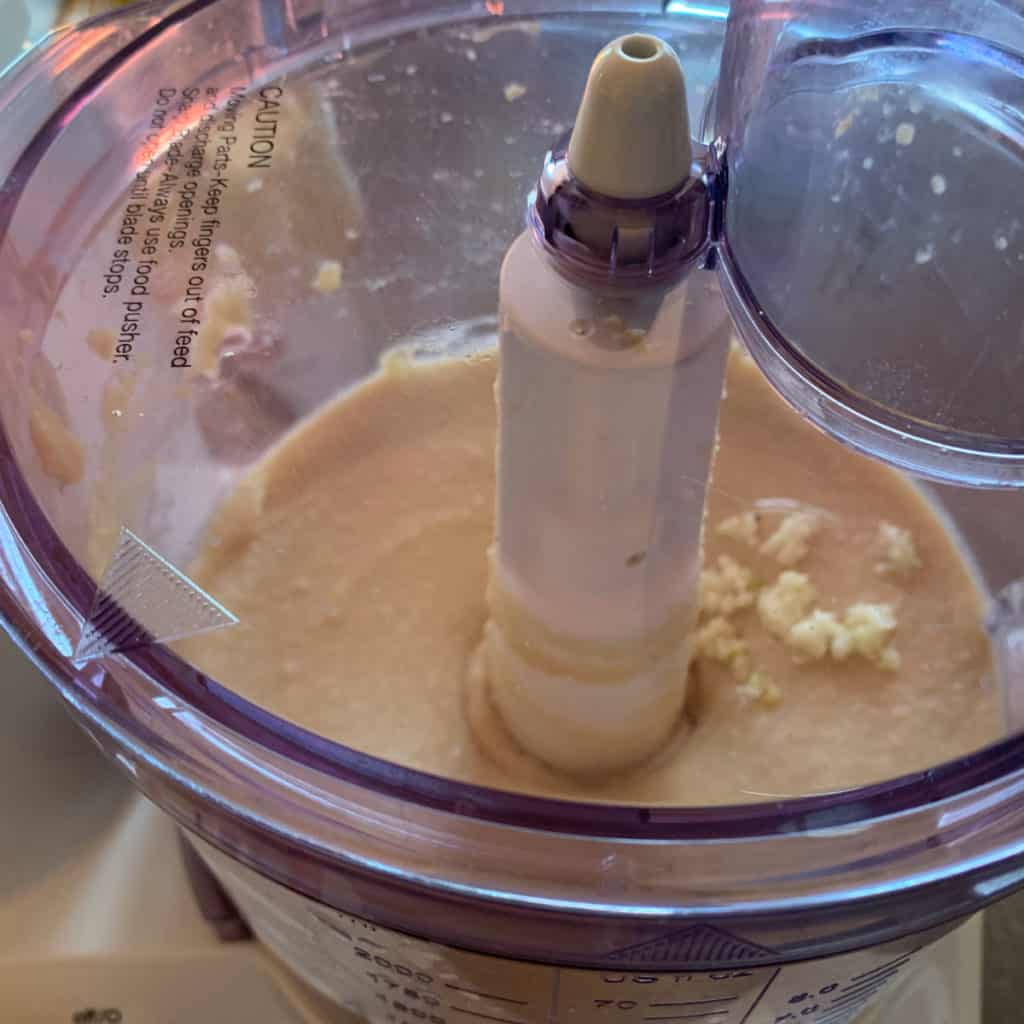
In a food processor, blend the chickpeas until they achieve a smooth consistency. Gradually add the reserved liquid, a couple of tablespoons at a time, while continuing to process. Incorporate the salt, garlic, and lemon juice. If the mixture still seems too thick, you can add more liquid (either water or the chickpea cooking liquid.)
Canned Chickpea Dip
They also have chickpea dip available in cans ready to serve. I use it as a base and add the tahini and lemon juice as mentioned in the following steps.

Step 4: Folding in tahini
Transfer the chickpea puree to a bowl and gently fold in the whipped tahini. Taste the hummus and adjust the seasoning to your preference.
What makes this different: Many recipes skip the tahini-whipping step, but this traditional technique creates the signature cloud-like texture that makes this garbanzo dip so special.
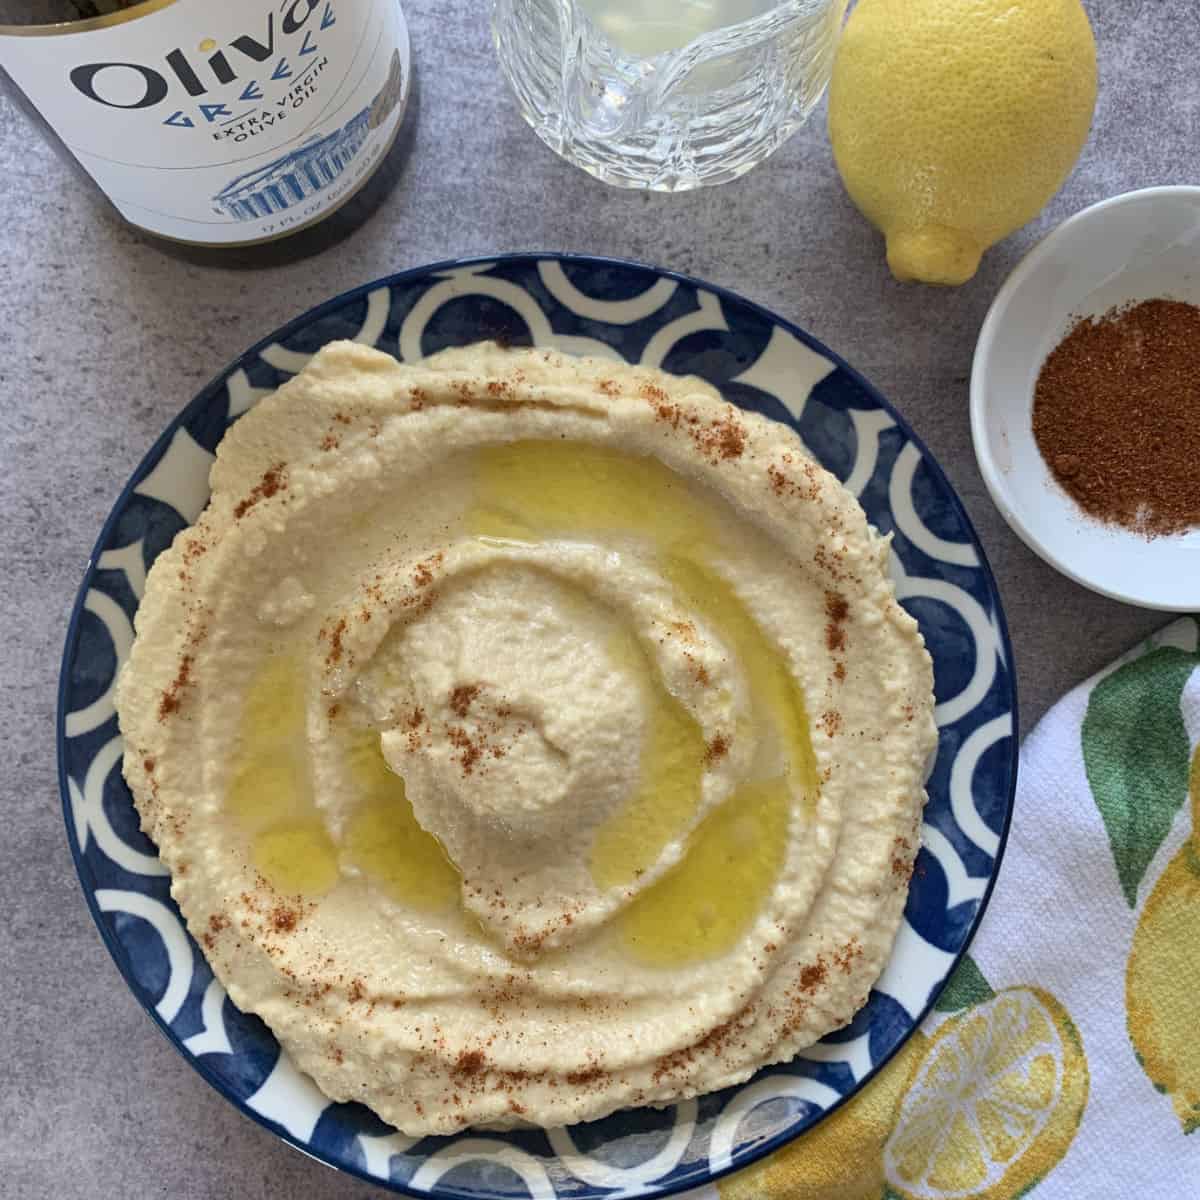
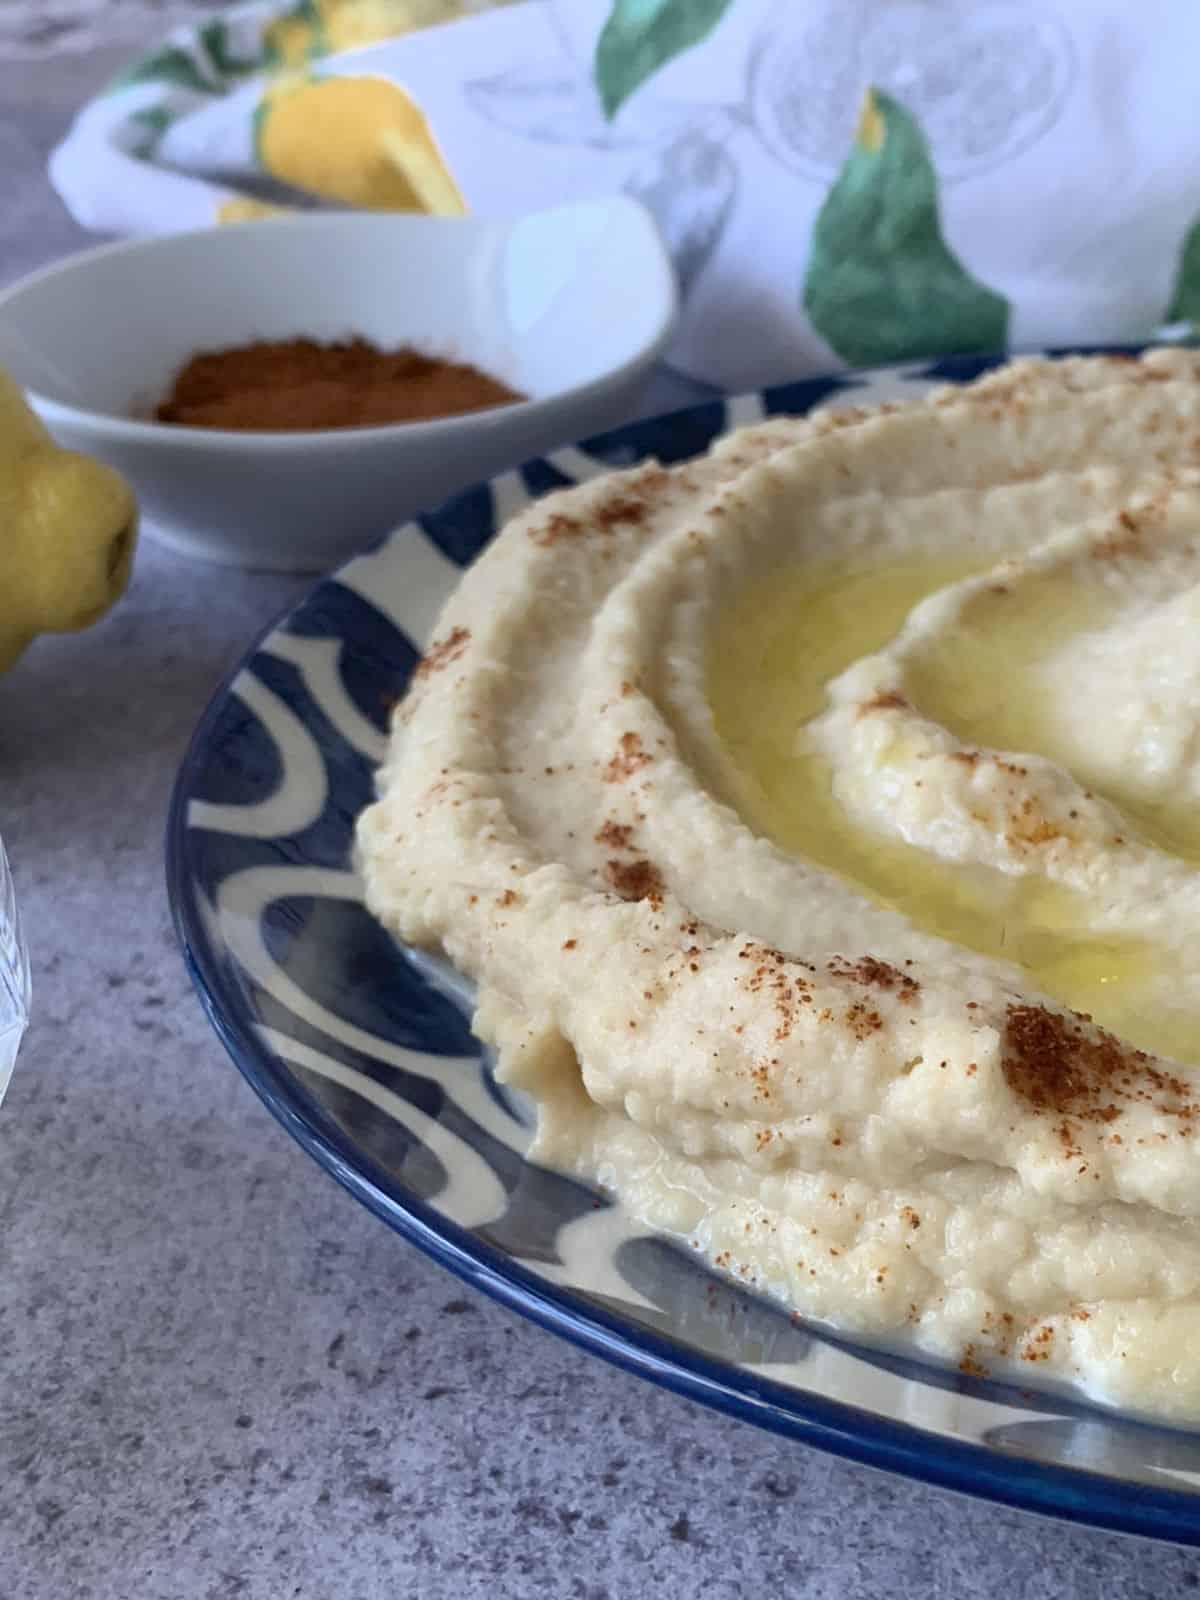
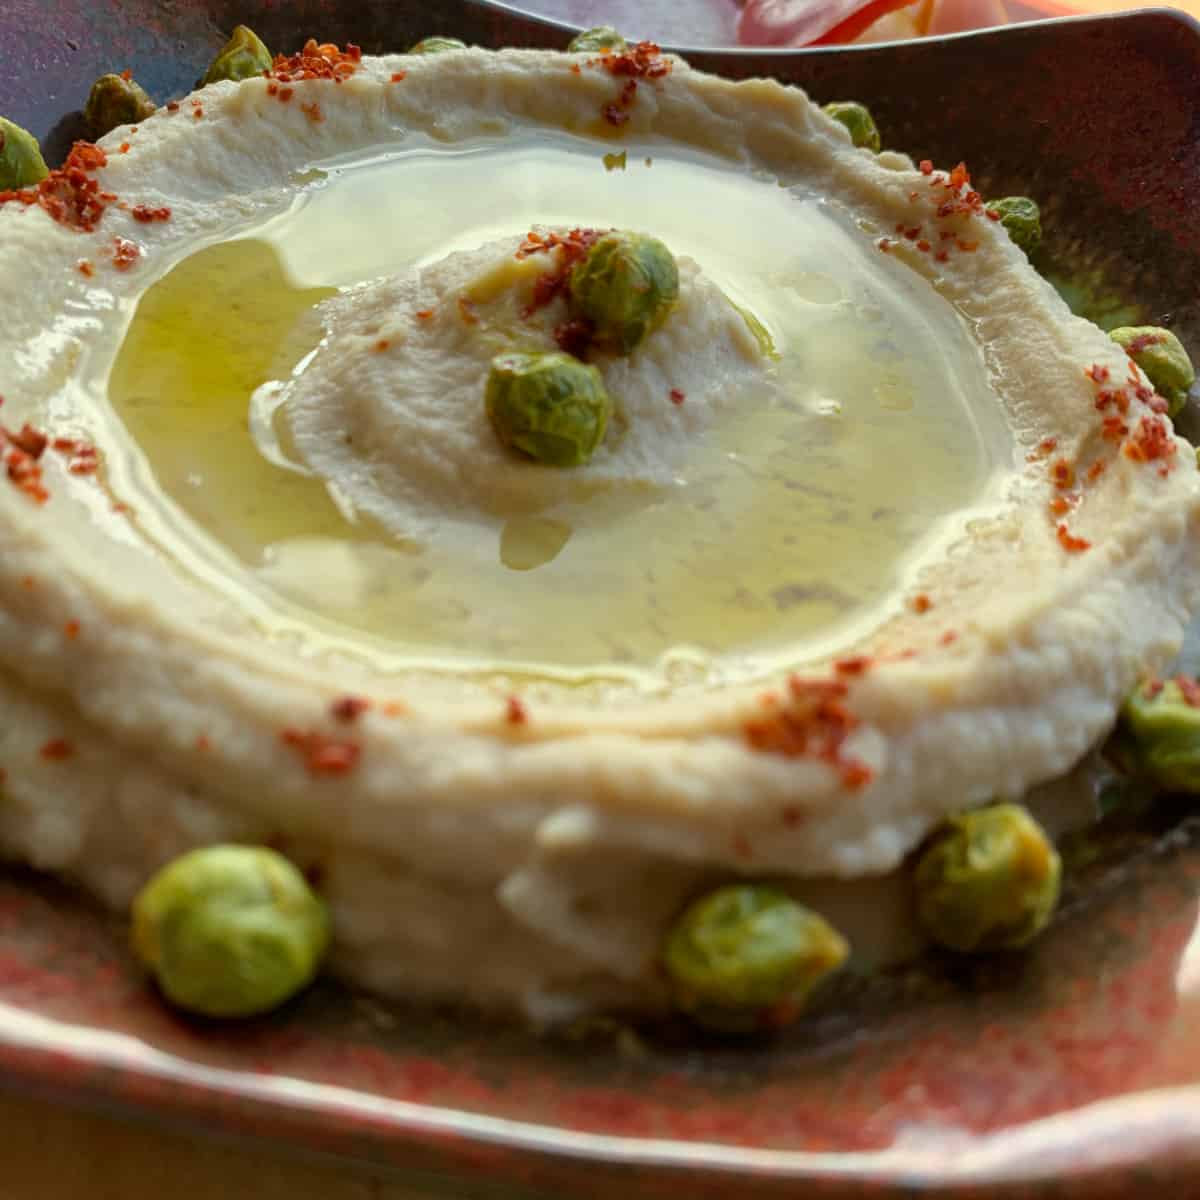
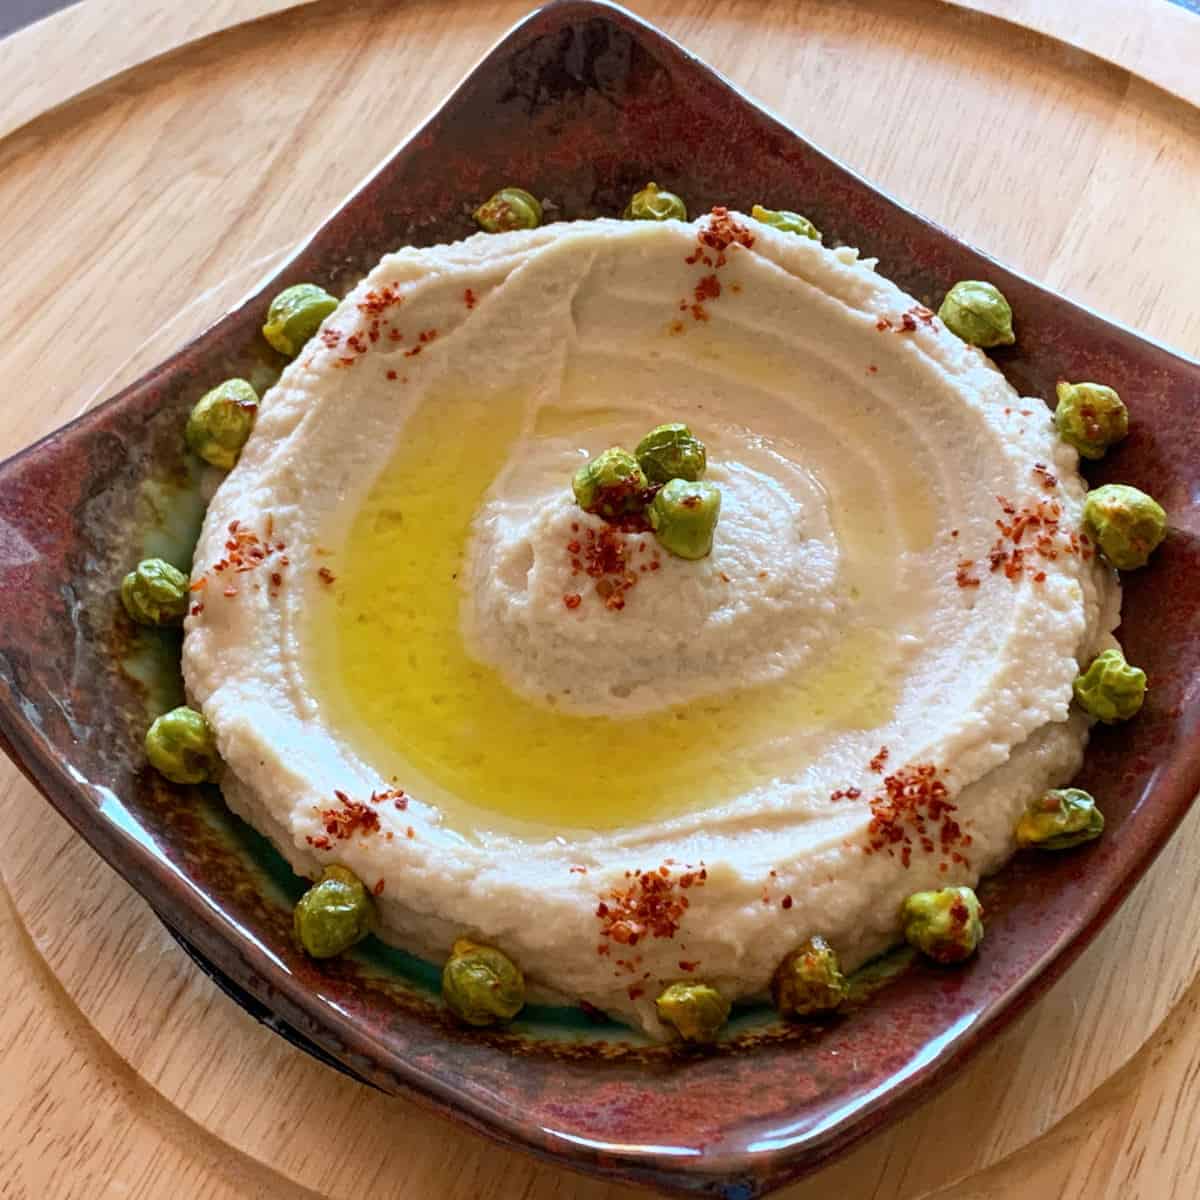
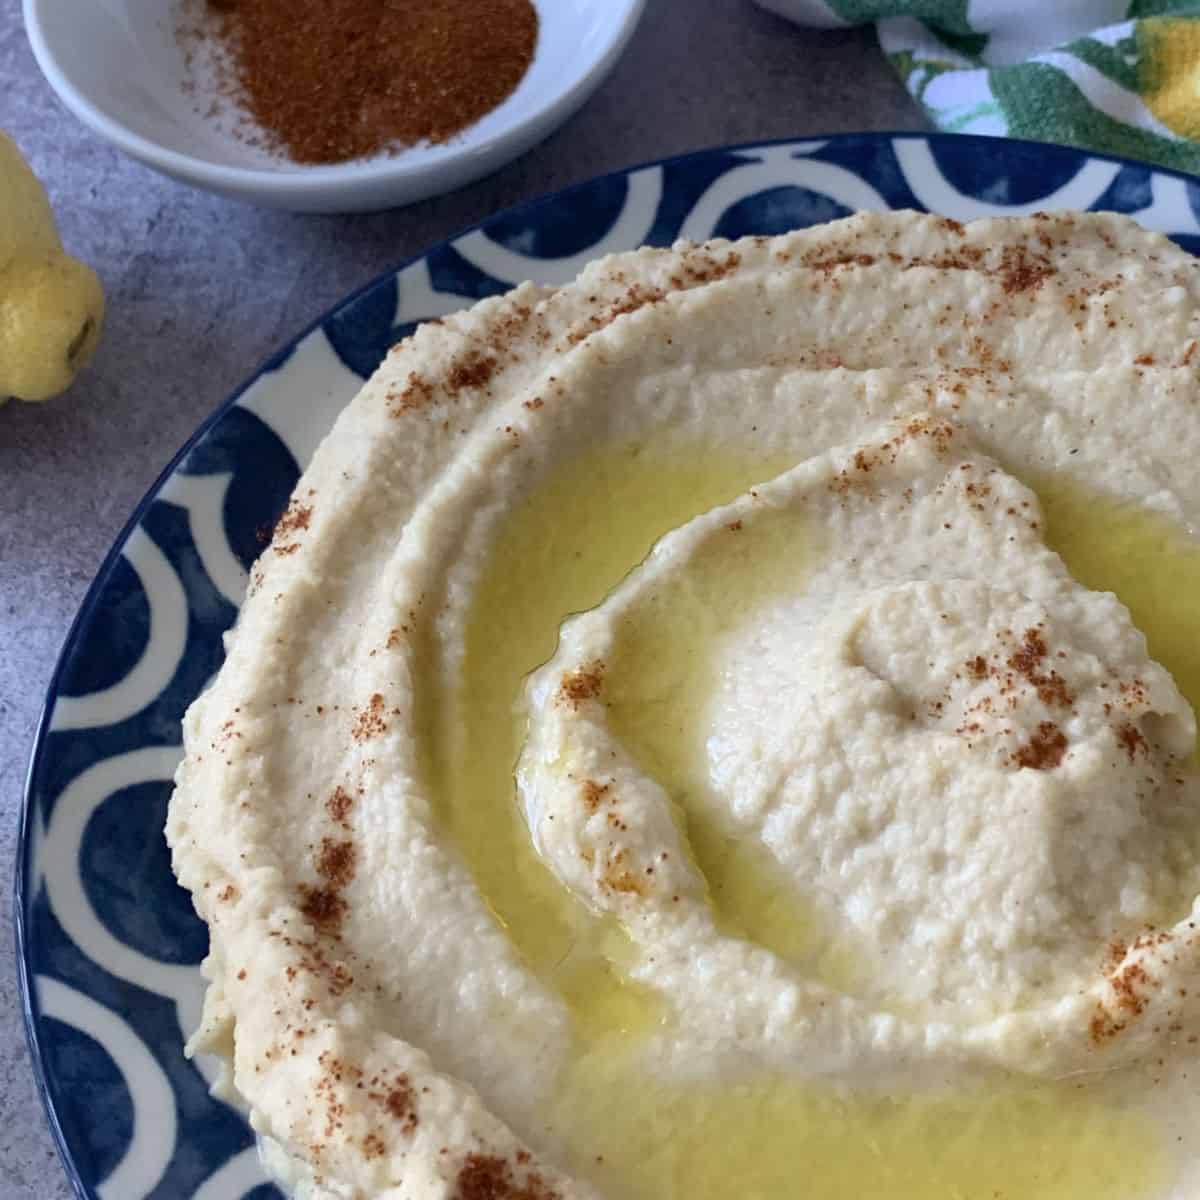
When serving, place the hummus on a shallow plate and create a well in the center using a spoon. Drizzle some olive oil into this well, followed by a few teaspoons of lemon juice. Sprinkle paprika, Aleppo pepper, or red chili pepper around the edges of the hummus for added flavor and a touch of color.
What Goes Well With This (Serving Suggestions)
Transform this hummus into the centerpiece of an incredible mezze spread. I love serving it alongside my Traditional Falafel and Herb Marinated Goat Cheese for varied textures and flavors. For a complete meal, try it with Stuffed Peppers Farshirovka or as part of a mezze board featuring Family Favorite Falafel Pizza.
Traditional presentation: I spread the hummus on a shallow plate, create a well in the center with a spoon, then drizzle olive oil and lemon juice into the well. A sprinkle of paprika or Aleppo pepper around the edges adds beautiful color and a touch of heat.
Tips and Wisdom from Cafe Osharak
Frequently Asked Questions
Can I make chickpeas dip ahead of time?
Absolutely! I often make it a day ahead – the flavors actually improve overnight. Store covered in the refrigerator and bring to room temperature before serving.
What is traditional hummus made of?
It’s not hard to make, and only has four main ingredients: chickpeas, tahini, lemon juice, and garlic.
How is hummus traditionally served?
Traditionally, hummus is presented in a dish accompanied by flatbread, such as pita. It pairs wonderfully with both fresh and grilled vegetables and is often served as a delightful side dish with grilled meats. A classic presentation involves creating shallow indentations on the hummus surface, followed by a generous drizzle of olive oil and lemon juice. To enhance its flavor and visual appeal, sprinkle paprika, cayenne pepper, sumac, or Aleppo pepper over the top.
More from the Armenian & Middle Eastern Meze Table
Hummus is the meze table’s most generous constant – always present, always welcome, always the thing that holds the spread together. These are the dips and spreads that belong alongside it.
More Armenian Tradition Recipes to Try from Cafe Osharak

Hummus – Creamy Delicious Chickpeas

Ingredients
- 1 cup dried chickpeas soak overnight
- ½ cup tahini whipped with 2-3 tablespoons of water
- ½ cup lemon juice freshly squeezed
- ½ cup water from the cooked chickpeas
- 2-3 cloves garlic
- Salt
- 1 teaspoon Baking soda
- 1/2 teaspoon Paprika, Aleppo pepper, or red chili pepper for garnishing
- 1-2 tablespoon olive oil for garnishing
- 2 teaspoon lemon juice for garnishing
Instructions
- Cook the chickpeas until they are very tender. See additional steps in the post.1 cup dried chickpeas, 1 teaspoon Baking soda
- Strain the chickpeas and process in the food processor until smooth.
- Add the minced garlic and lemon juice. Season with salt. Continue processing until the garlic is fully incorporated.½ cup lemon juice , 2-3 cloves garlic, Salt
- Gradually adding reserved cooking liquid.½ cup water
- In a separate bowl, whip tahini with 2-3 tablespoons water until light, airy, and doubled in volume.½ cup tahini
- Fold in the whipped tahini into the garbanzo pure.
- Spread evenly on a shallow plate and make an indentation. Drizzle with olive oil, lemon juice, and sprinkle with paprika.1-2 tablespoon olive oil, 1/2 teaspoon Paprika, Aleppo pepper, or red chili pepper


I loved this recipe but I am biased (as her husband)!
It looks and sounds delicious! I like most if not all of the ways you describe these delicious dishes.
Thank you for all that you’re doing and keep up with using the genuine Armenian names of most of your Armenian dishes as opposed to the “other” if you know what I mean?
Thanks, Lévon for landing on my blog. Yes, I would like to present the rich Armenian cuisine to a broader audience.