
Homemade Kefir -Fermented Milk Drink

This post may contain affiliate links. As an Amazon Associate, I earn from qualifying purchases. See my Affiliate Disclosure .
Making homemade milk kefir is one of the most rewarding and simple ways to bring probiotic-rich fermented foods into your daily life. This creamy, tangy drink has been a staple in my kitchen for years, and I’m excited to share my method with you.
Kefir, fermented milk offers a good source of probiotics. The cauliflower-like grains are used as a starter and added to fresh milk. Fortunately the process of making homemade kefir is easy and affordable. Making kefir literally takes 5 minutes. Follow along to learn how to make kefir at home.
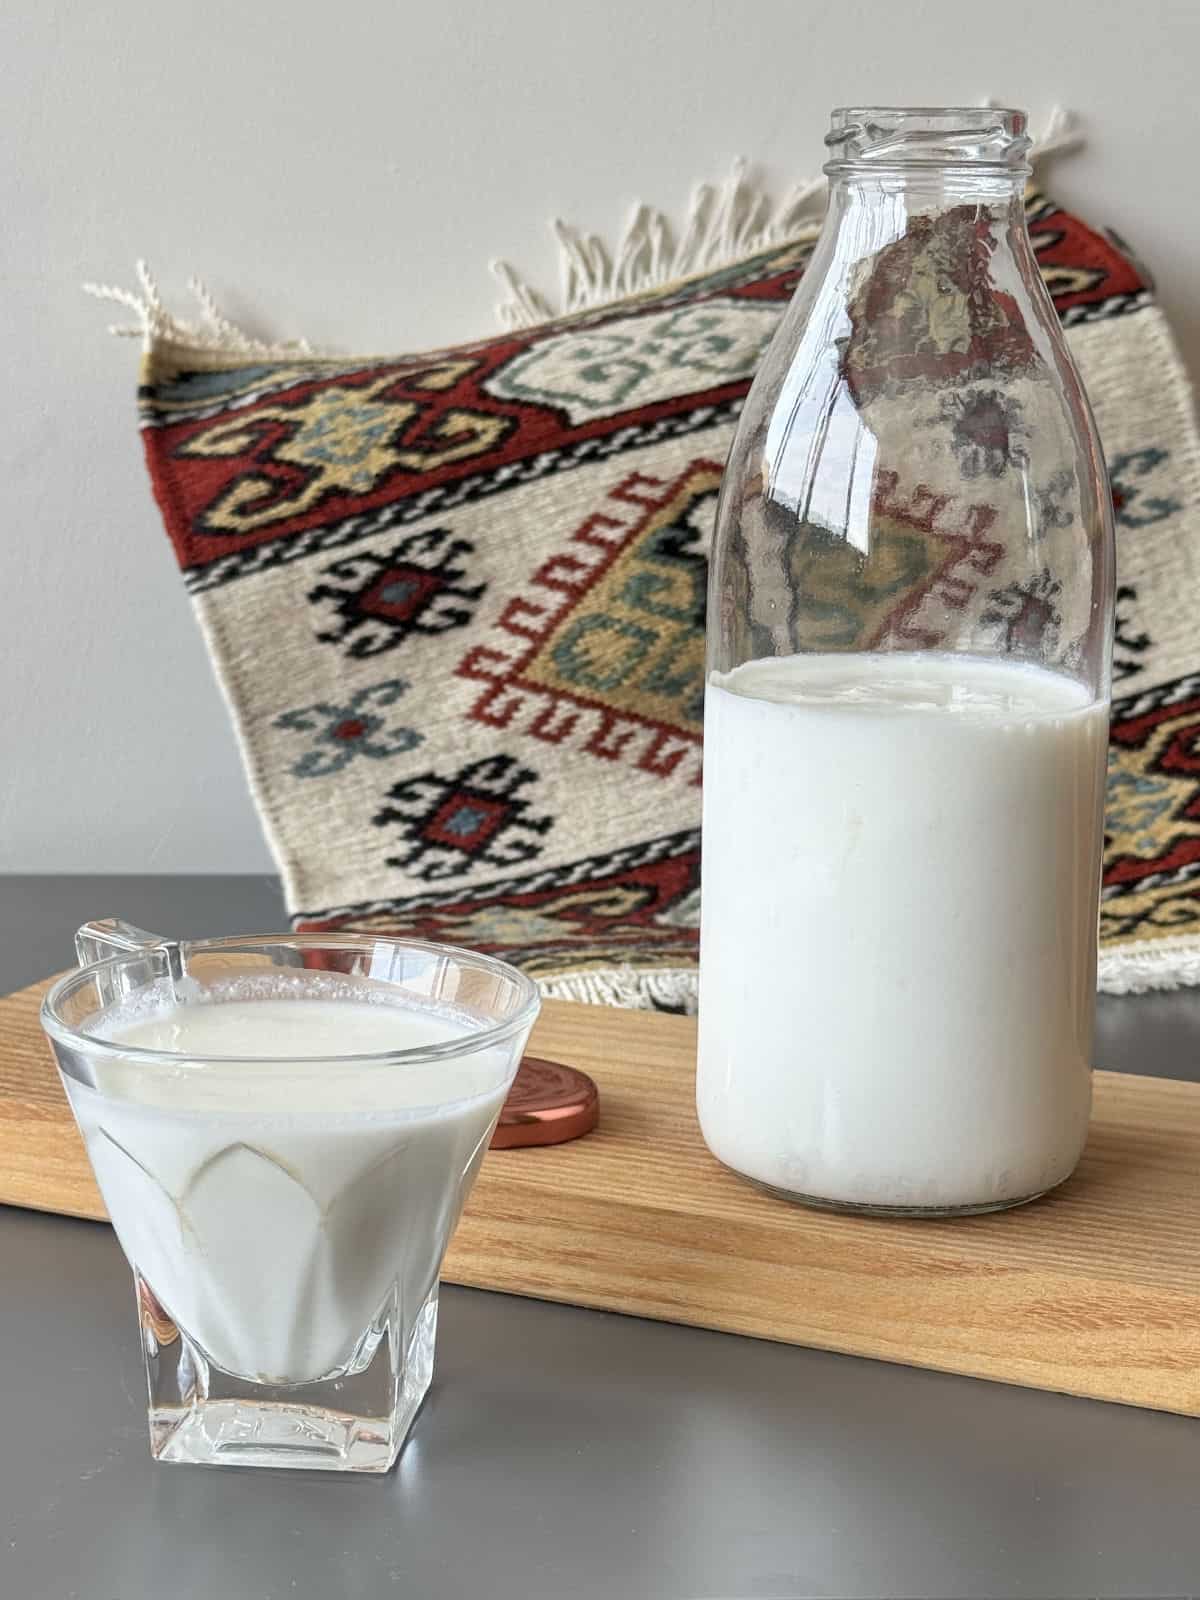
Table of Contents
Chronicles of Kefir

What is kefir and where did it originated?
Kefir provides a large part of the diet of the mountaineers of the Caucasus, famous for their longevity. It is also known for its amazing healing powers.
One of the first researchers of kefir, V.V. Podvysotsky, came to the conclusion that the kefir grains were an accidental creation due to the change in starter product. When the tribes from Central Asia steppes moved into Caucasus Mountain, they brought their cultured drink kumis, which is a fermented mare’s milk. In due course, the horse milk was replaced by more prevalent cow’s milk and the magical amalgamation happened.
For the first time, the benefits of kefir were officially discussed in the middle of the 19th century. The Tiflis doctor Dzogin told his colleagues in the Caucasian Medical Society about it in 1867. Gradually the rumor about the healing properties of the drink spread far, beyond the Caucasus mountain and even beyond the Russian Empire.
Today, people around the world enjoy kefir drinks.
Why I Love Kefir

Essential Grocery List and Ingredient Notes
Time Commitment and Prep Tools
Estimated time
Special tools you’ll need
Recipe Steps at a Glance
How to Make Kefir at Home
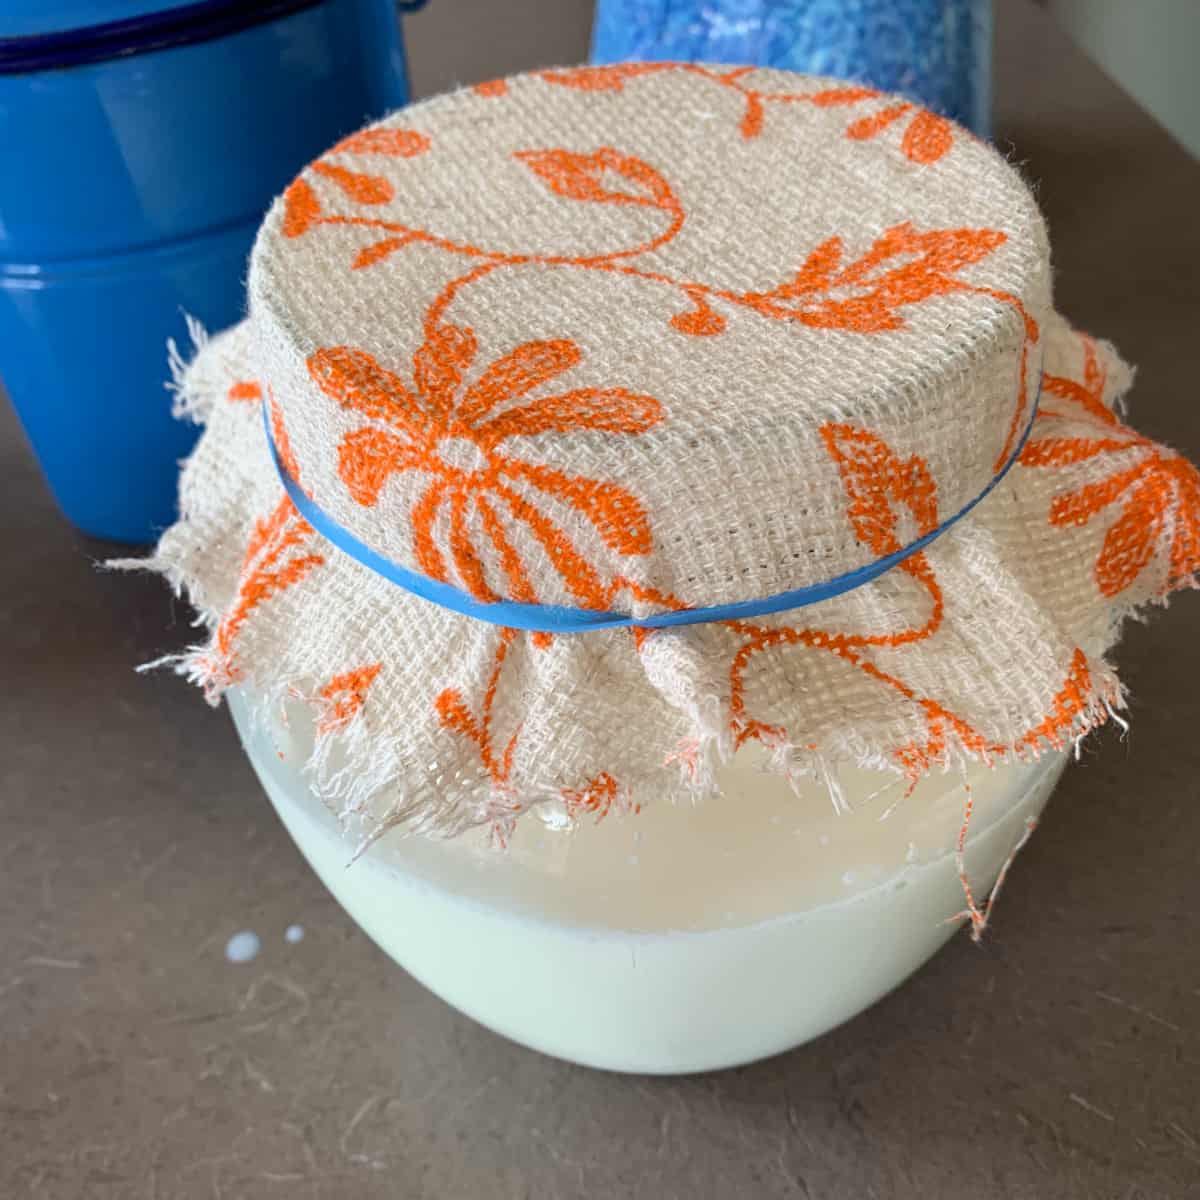
Step 1: Prepare for fermentation

Pic. 1 Pic. 2 Pic. 3
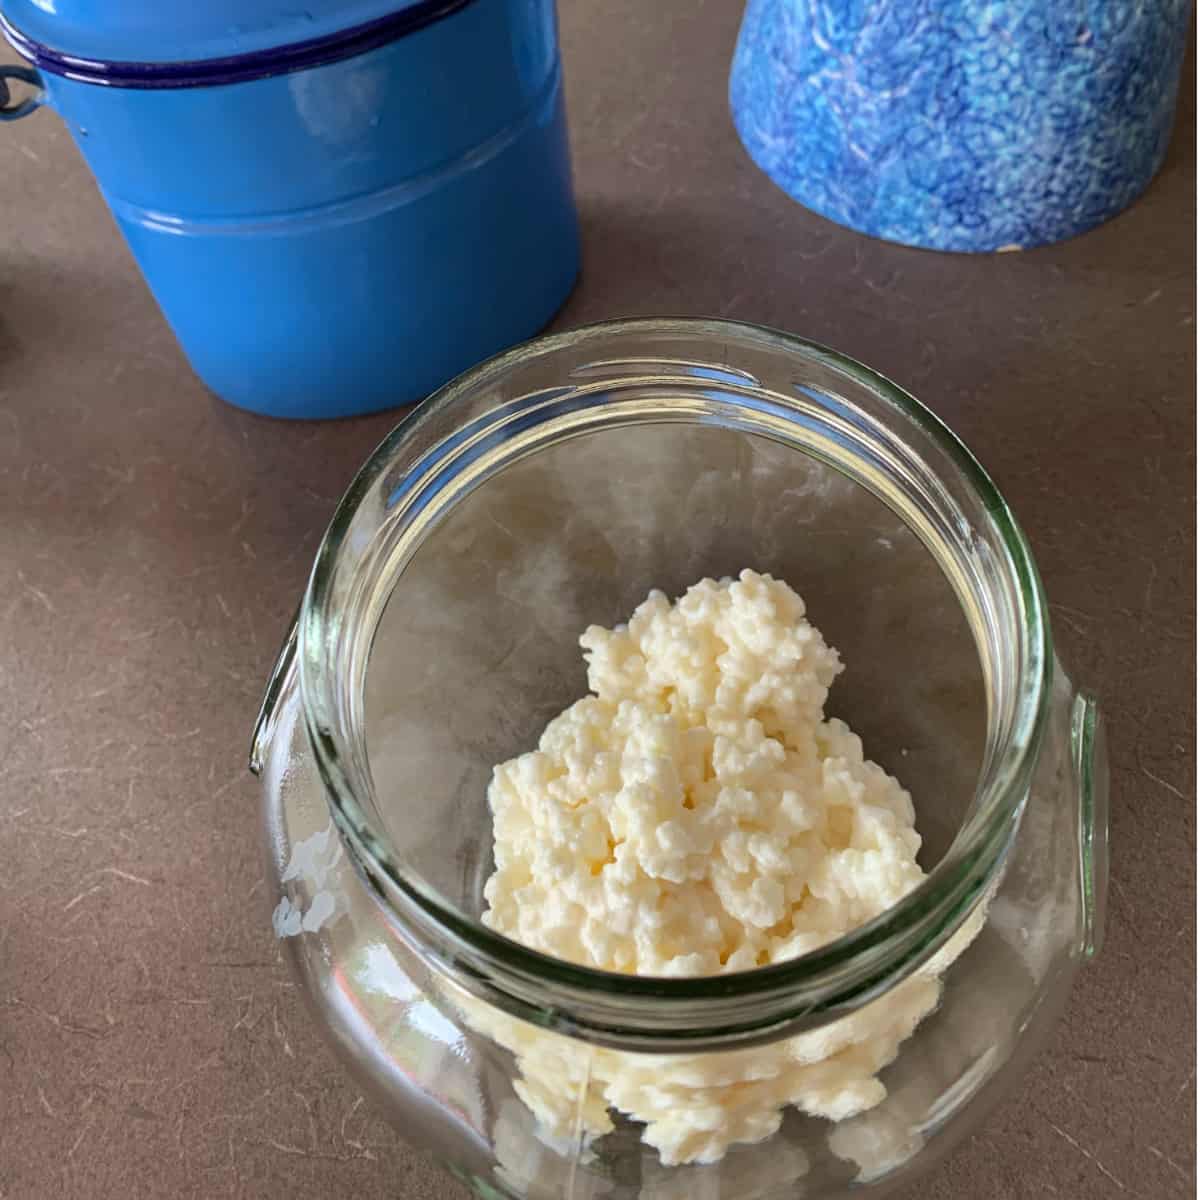

Start by ensuring your glass jar is thoroughly clean—this helps prevent any unwanted bacteria from interfering with the fermentation process.
Add your kefir grains to the jar (Pic. 1), then pour in fresh milk, leaving some space at the top for natural expansion.
Give the mixture a gentle stir to break up any clumps of grains (Pic. 2).
Loosely cover the jar with a breathable material such as a towel, cheesecloth , or a coffee filter (Pic. 3) secured with a rubber band (my favorite method).
Let the jar sit at room temperature for 24 hours, away from direct sunlight. You’ll know fermentation has occurred when the milk begins to separate into curds and whey—a sign that the kefir is ready for the next step.
Step 2: Straining the kefir
After fermentation, stir the mixture gently with a spoon or spatula.
Pic. 4 Pic. 5 Pic. 6


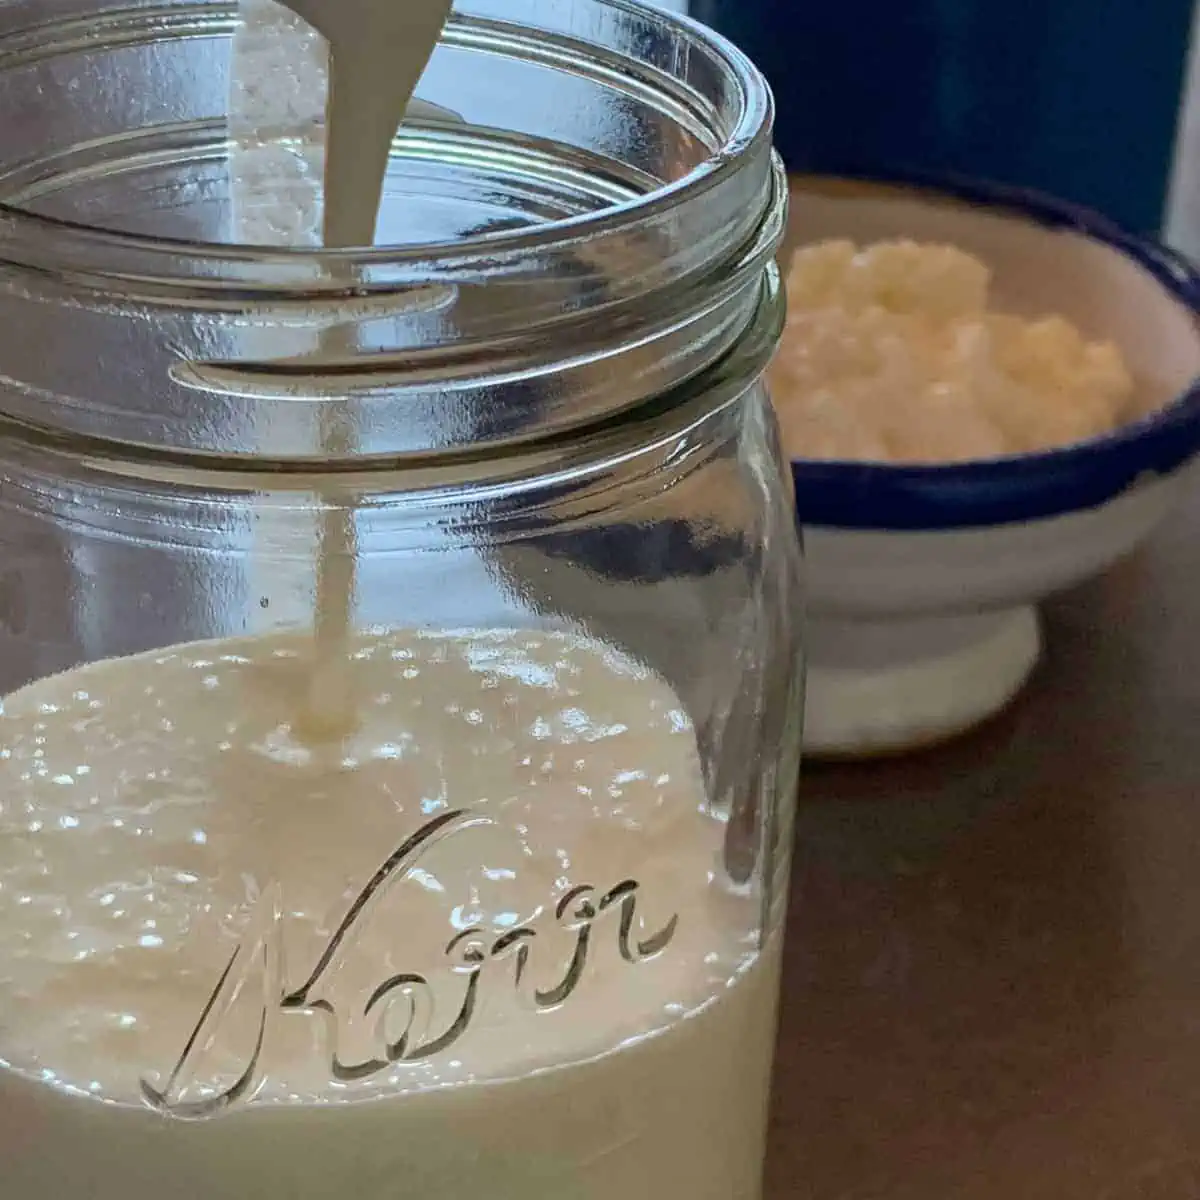
Next, pour the contents through a fine-mesh strainer into a clean container. The strainer will catch the grains while allowing the liquid kefir to flow through. Gently press the grains with a spatula to extract as much of the finished kefir as possible (Pic. 4 & 5).
Set the grains aside. They’re ready to be reused!
Pour the strained kefir into a clean glass jar with a lid (Pic. 6), seal it tightly, and store it in the fridge. It will continue to develop flavor and slight carbonation as it chills.
Step 3: Storing and reusing the kefir grains
To continue the cycle, wash your fermentation jar, return the grains, add fresh milk, and start again. You can do this daily or pause anytime.
When you’re ready for a break, simply cover the grains with milk and store them in the fridge. Since kefir grains are a living culture, they’ll need to be “fed” with fresh milk about once a week to stay active.
Over time, your kefir grains will multiply! When you have more than you need, you can:
- Use in the garden as a probiotic boost
- Add a spoonful to smoothies with berries
- Share with friends
- Feed them to pets (in moderation)
Ways to Use Homemade Kefir
Tips and Wisdom from Cafe Osharak

Frequently Asked Questions
Can I use non-dairy milk?
Kefir grains thrive on lactose, so dairy milk is ideal. However, you can use non-dairy milk for short periods, but it’s essential to return the grains to dairy milk regularly to keep them healthy.
How do I know if my kefir is ready?
The milk will thicken and may separate into curds and whey. It should have a tangy aroma.
What if I need a break from making kefir?
Store the grains in the refrigerator covered with milk. Feed them fresh milk weekly to keep them alive.
More Recipes to Try from Cafe Osharak
Enjoyed homemade recipes? Then you’ll love Spicy Mustard, Homemade Ricotta, and Blackcurrant Jam! They’re just as flavorful and fun to make. Check them out and let me know which one you try next!


Loved this recipe or any other from my blog? Leave a 🌟 star rating and share your experience in the 📝 comments below. Your feedback means a lot!”
Homemade Kefir -Fermented Milk Drink

Ingredients
- 5 tablespoon Active Milk Kefir Grains heaping spoon
- 5 cups Whole Milk
Instructions
- Place your active kefir grains in a clean glass jar.
- Add the whole milk and give a gentle stir with a wooden or plastic spoon.
- Cover your jar with a cheesecloth or a napkin securing it with a rubber band.
- Leave the jar on a cupboard or a counter at room temperature for 12-24 hours. The kefir is ready when pockets of whey start to appear, and the milk has thickened considerably.
- Set a fine sieve over a glass bowl. Gently stir the fermented milk kefir with a rubber spatula and strain the whole thing. Use the spatula to push the kefir through the stainer. The grains will stay behind.
- Retain the grains for your next batch of milk kefir.
- Pour the finished milk kefir into a new clean glass jar and close it with the lid.
- The grains are ready to use again or stored in the fridge by adding enough milk to cover the grains.


I have been eating the grains! Along with our daily smoothies from the kefir.