Family Favorite Chicken Kiev – Kotlet à la Dora

This post may contain affiliate links. As an Amazon Associate, I earn from qualifying purchases. See my Affiliate Disclosure .
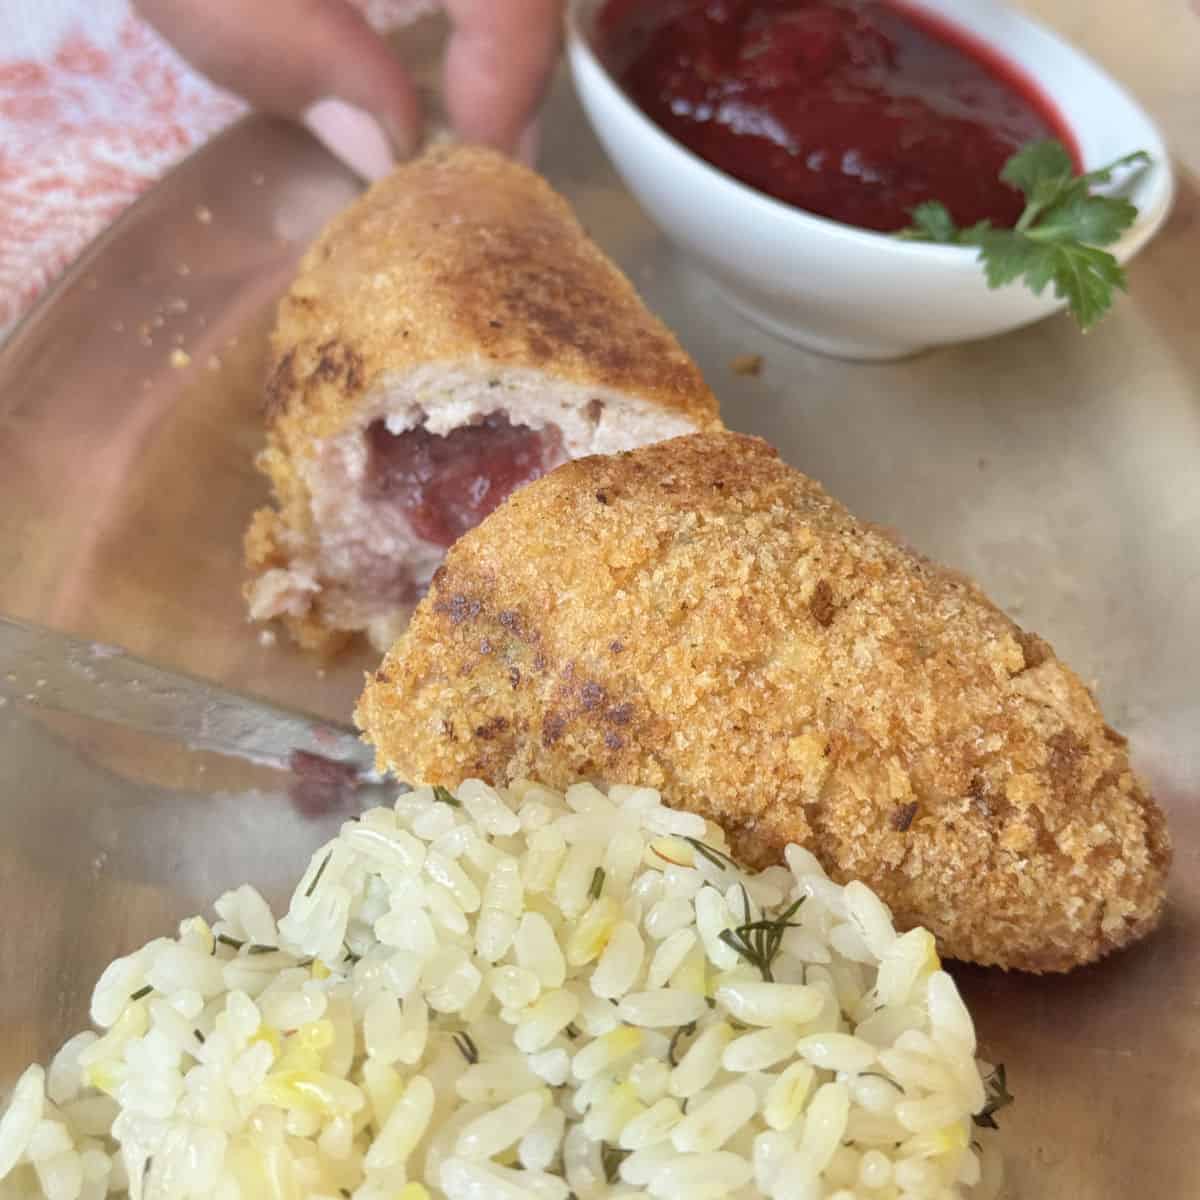
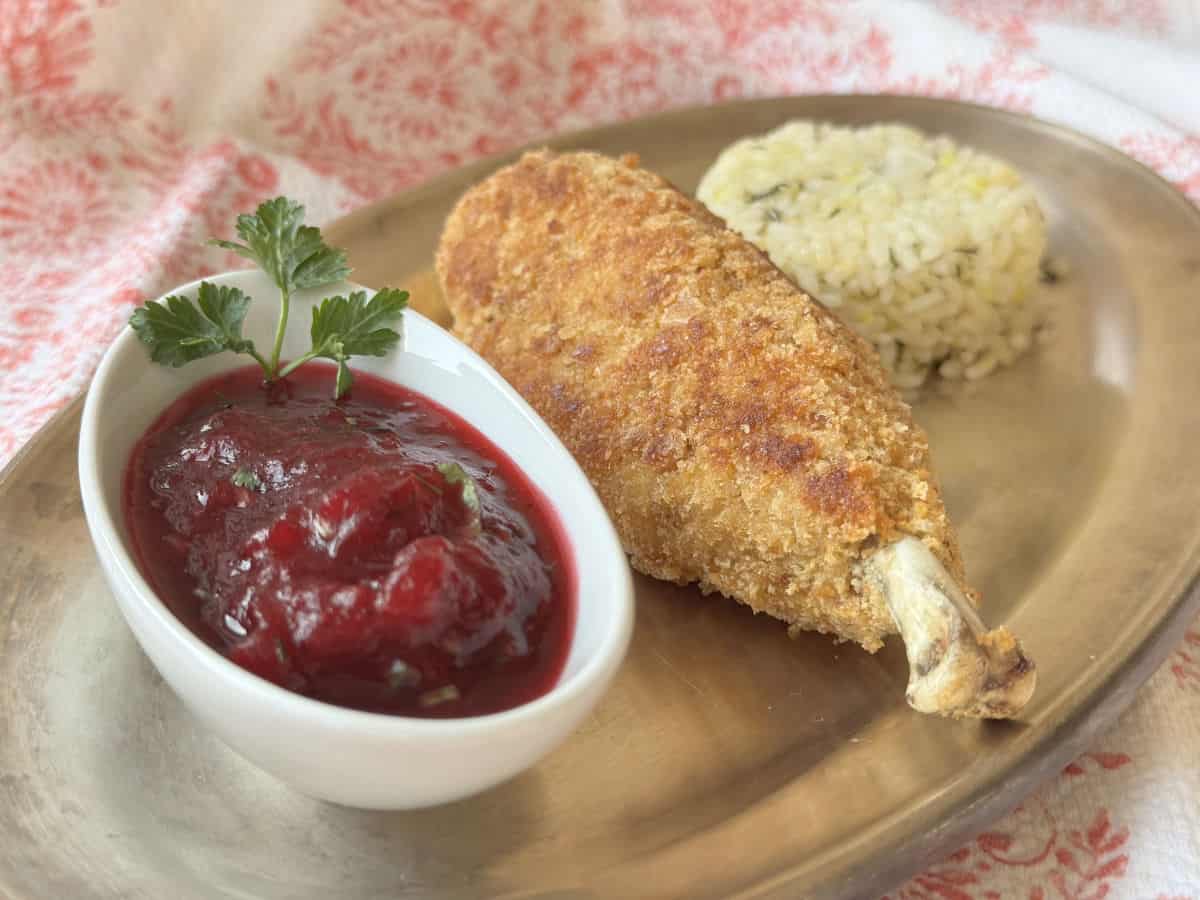
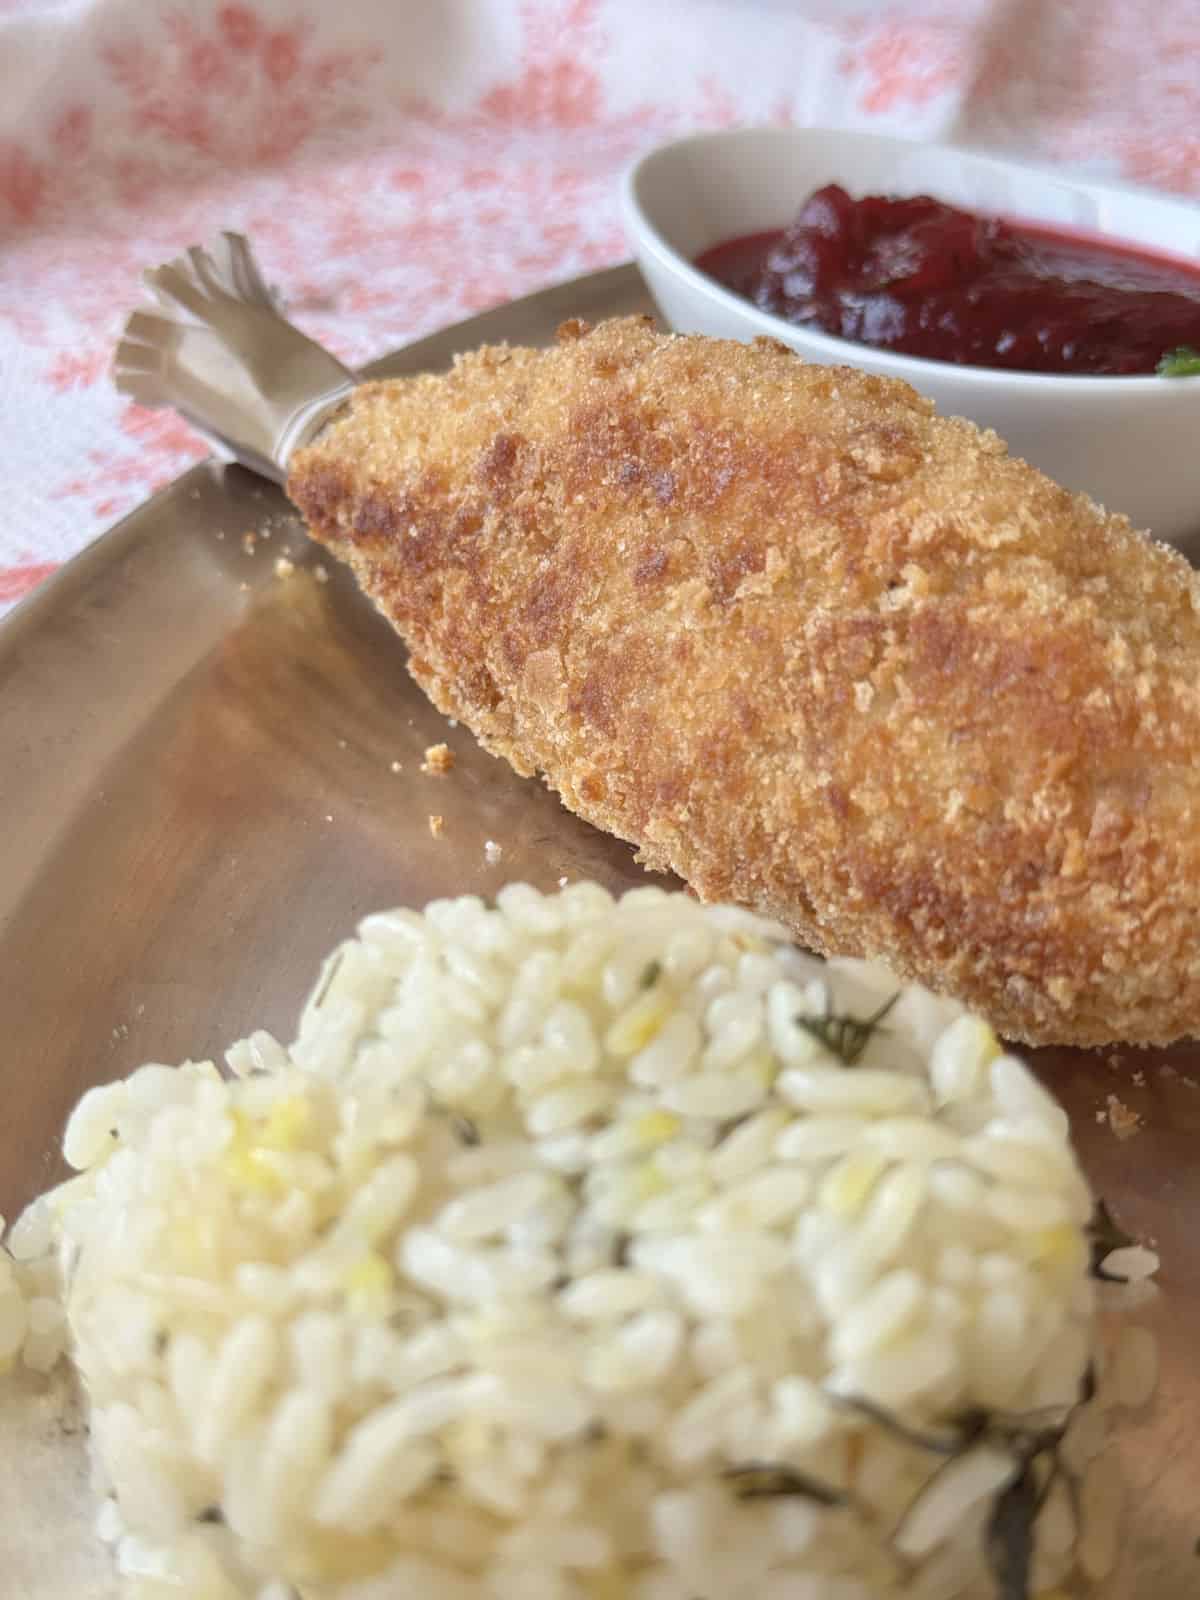
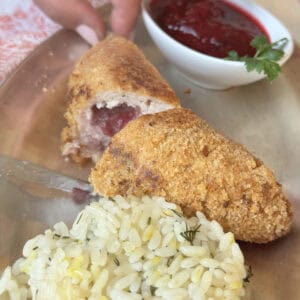
Our family’s version of Chicken Kiev Kotlets is juicy and moist, double-coated with homemade breadcrumbs and stuffed with rich cranberry butter. This dish has become a holiday and birthday staple, perfect for feeding a crowd. Each kotlet is handcrafted, bursting with luscious cranberry butter as it bakes. And for the little bone attached? It’s the ultimate touch of elegance and tradition.
Menu Suggestion: Make It a Meal
For the whole menu idea,
Table of Contents
Chronicles of Dora’s Chicken Kiev
Chicken Kiev kotlets are traditionally made with thin chicken breast, stuffed with herb butter, and breaded. The original recipe calls for a boned half chicken breast with the first wing joint still attached. This dish, which evolved and gained fame at the Continental Hotel in Kyiv, is closely related to Chicken Cordon Bleu and Chicken Parmesan.
During the Soviet era, Chicken Kiev was a high-class restaurant dish, served in international establishments catering to foreign guests and government families – rarely eaten by ordinary people. But in our home, my mom took this concept and made it her own. She prepared the kotlets for parties using a whole chicken, elevating the dish from restaurant fare to a stunning homemade centerpiece.
To make the presentation even more impressive, she would cook the bones separately, strain the broth for soup, and then incorporate the meat into the kotlets. Using the whole chicken not only made the dish more special but also ensured nothing went to waste. The addition of the bone was her signature touch – making the kotlets not just delicious, but truly unforgettable.
This recipe is a homage to my mom Dora – her culinary creativity, her vision, her aesthetics, and, above all, her ability to make everyone feel special.
Reasons I Love This Recipe
Grocery and Pantry List
Time Required:
Bake in a 400°F(200°C) preheated oven.
Special Tools to Use:
Recipe Steps at a Glance
This chicken kotlets recipe can be broken down into the following steps:
Step-by-step: How to Make
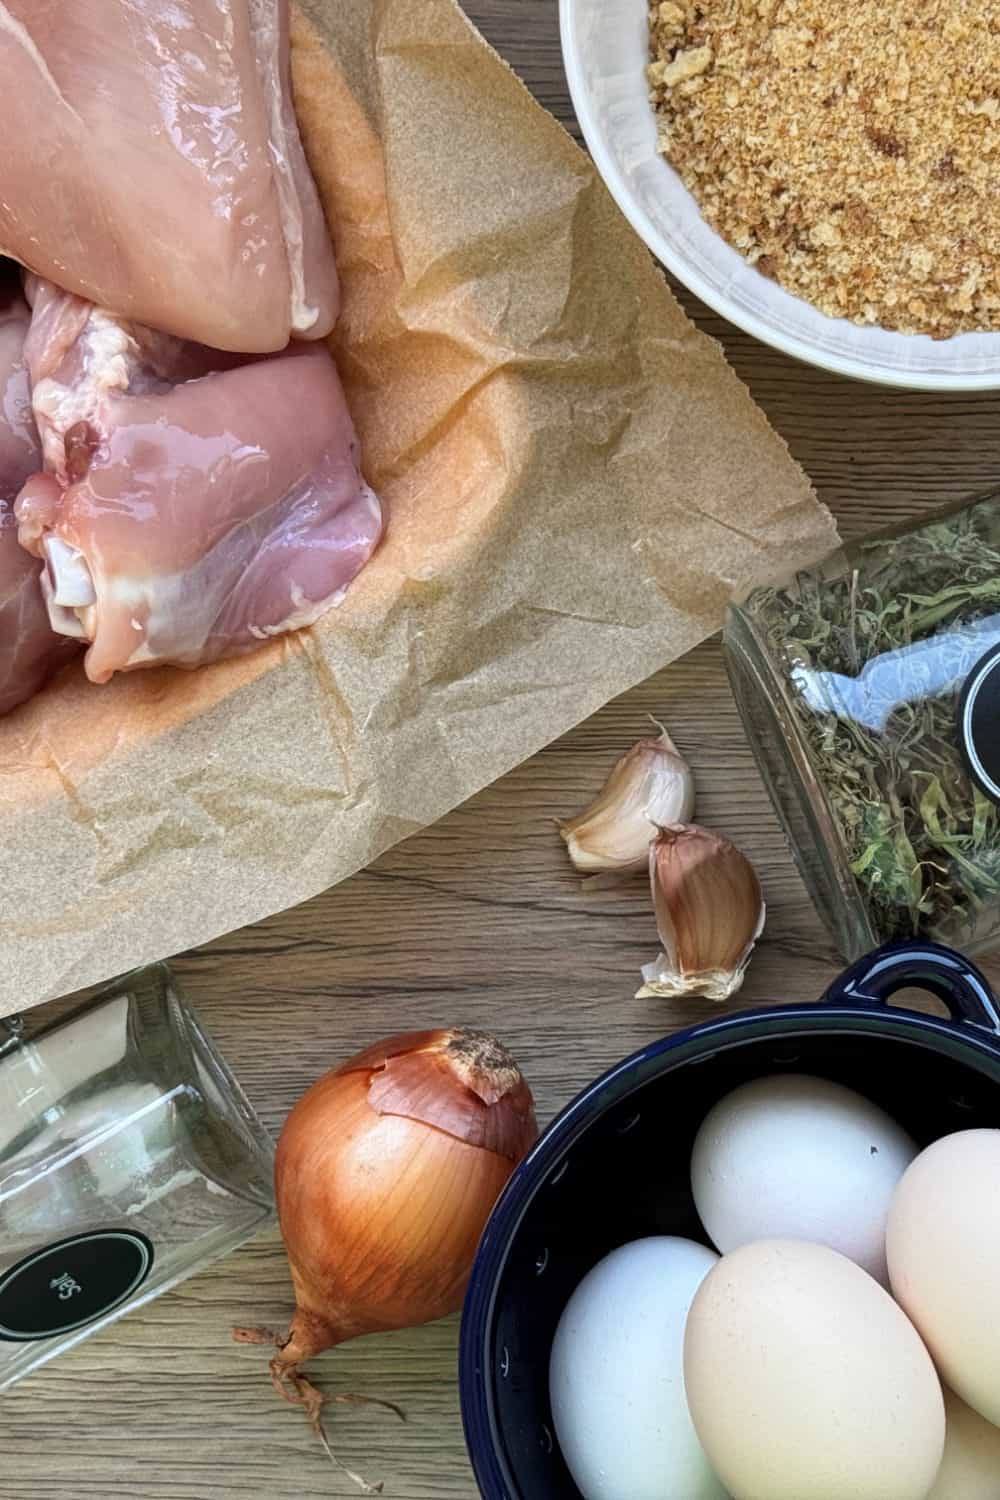
Step 1: Preparing the Ingredients
De-bone the chicken thighs and drumsticks. I am discarding the skin and any excess fat.
Bones
Optional: Cook the bones to make a flavorful chicken stock. Afterward, remove the bones, clean out any cartilage, and set aside. While optional, this step adds a special touch to the presentation.
Make the compound butter
Blend the softened butter and cranberries together. Spread the butter on saran wrap and form a square block. Chill in the fridge. Cut into thumb size bars and keep cold until ready to use.
Homemade Breadcrumbs
Cut French bread into slices and arrange on a sheet pan. Toast in a 325°F (160°C) for 20-30 minutes until they are dry and golden brown. Once cooled, pulse in a food processor until it’s a bread-crumb consistency.
Step 2: Grind the Chicken
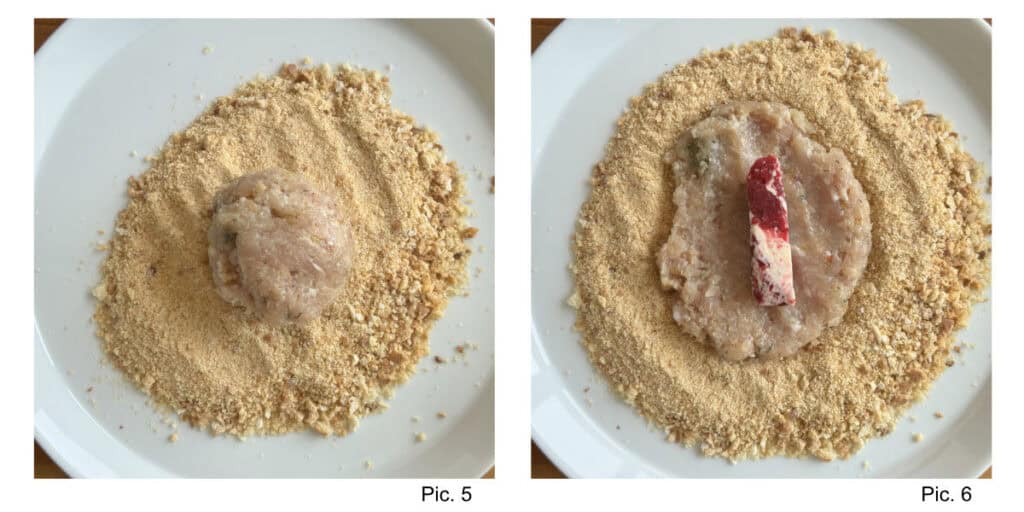
Using a meat grinder, mince the chicken breast, thigh, and leg meat. Run the onion and garlic through the grinder as well.
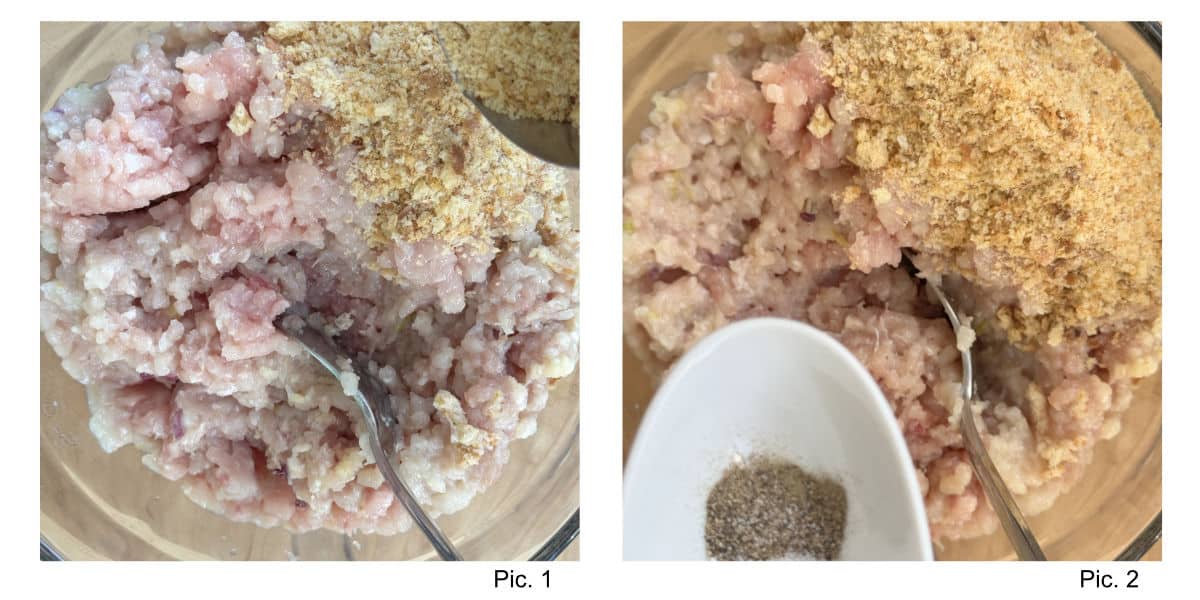
Add seasoning: salt, pepper, curry powder, breadcrumbs, and an egg to the ground meat.
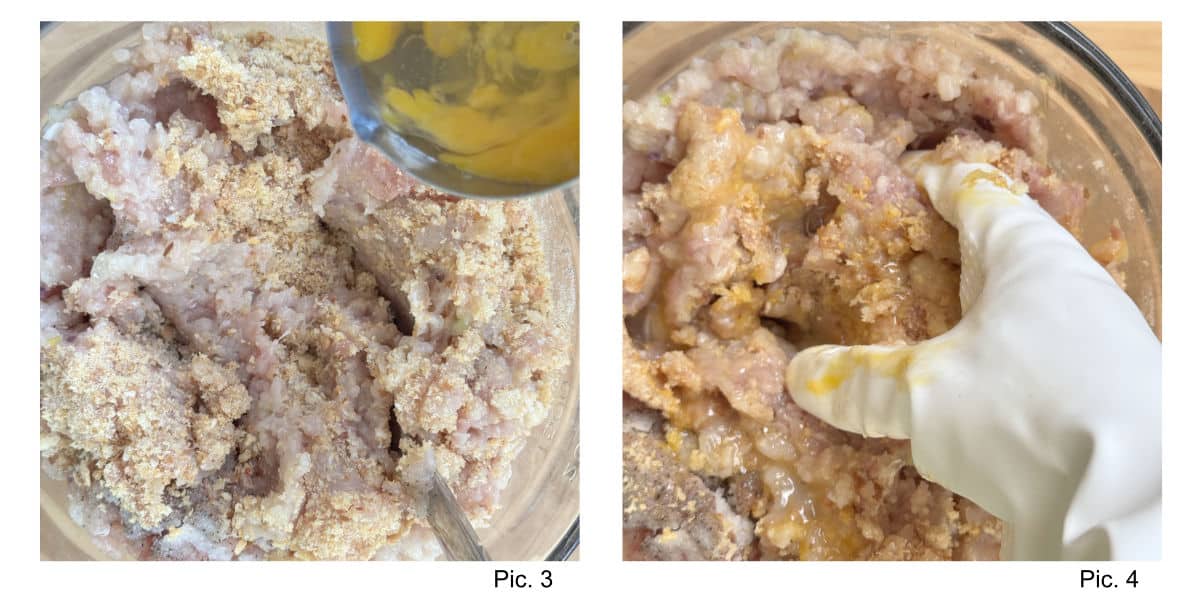
Mix thoroughly until everything is well combined. Cover the mixture and refrigerate for at least 1 hour to chill.
Step 3: Assemble the Kotlets
Have ready:
- A dish with breadcrumbs
- A bowl with beaten eggs
- A work surface with flour
- Have chilled butter sticks and cleaned bones ready.
Divide the chilled chicken mixture into 12 equal portions.
Assembly Process:
Dredge each portion in flour and flatten it into a disc.
Place a thin butter stick in the center of the disc. Position a bone so that half is inside and half extends out.
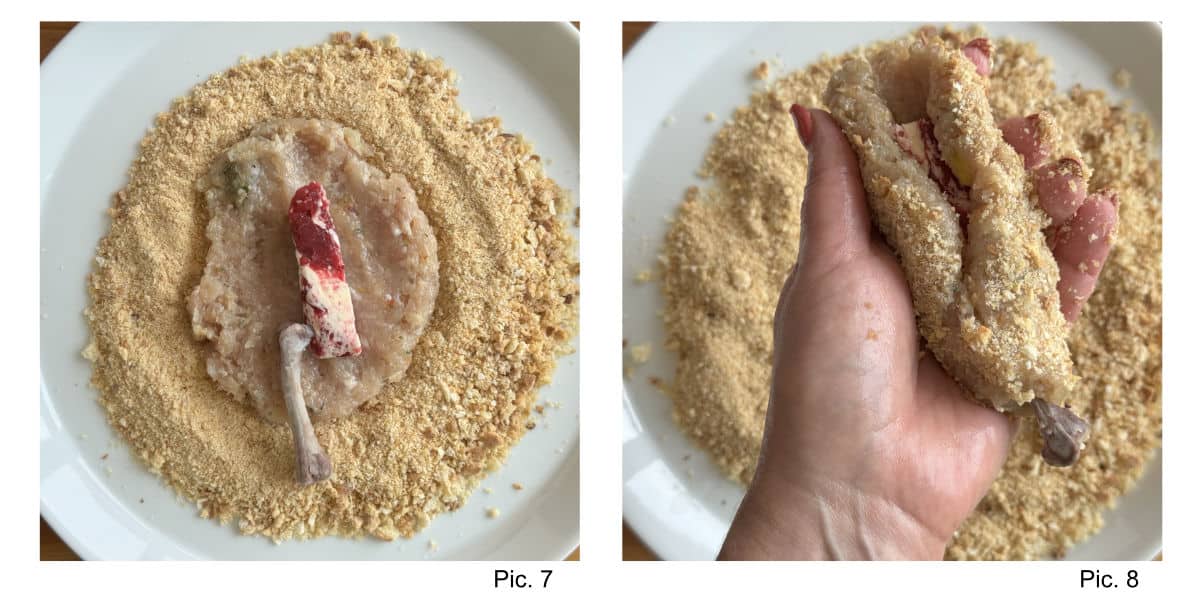
Fold the sides of the disc inward, enclosing the butter and ensuring the bone is securely nestled.
Shape the mixture into an oblong torpedo with the bone visible at one end.
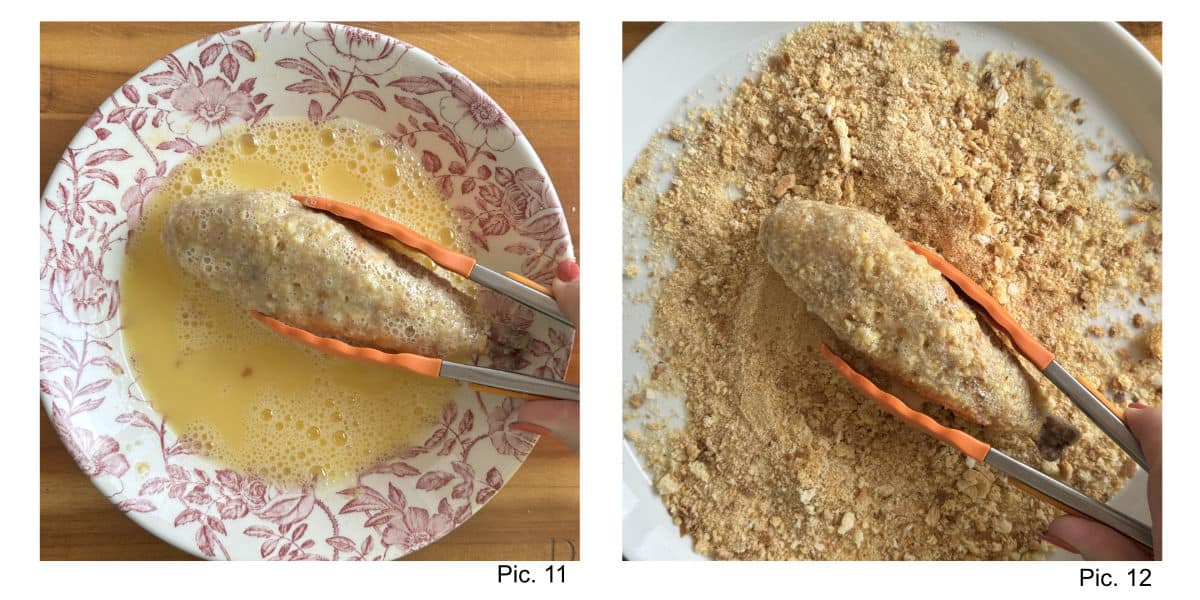
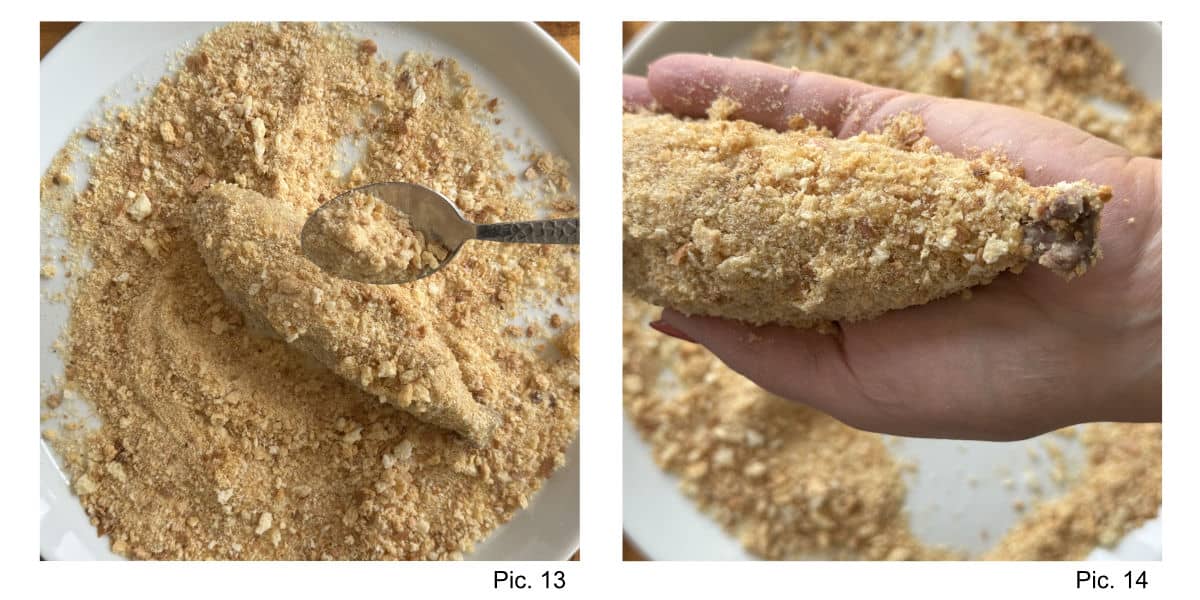
Dip the shaped kotlets into egg whites, then coat them evenly in breadcrumbs.
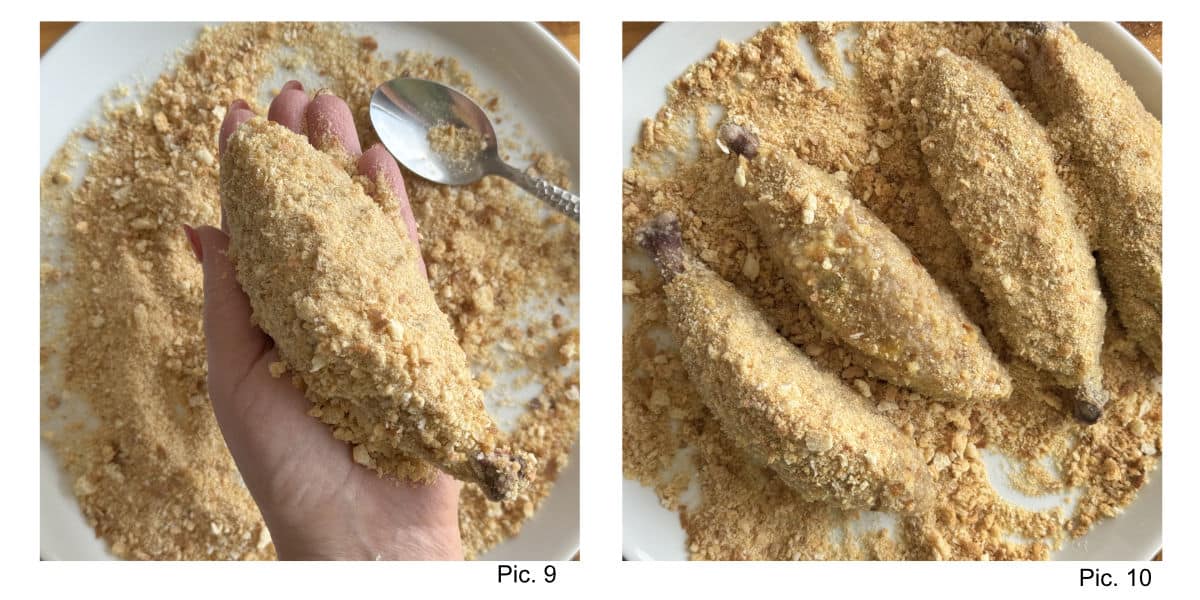
Double Coating:
For an extra crispy coating, place the kotlets in the freezer briefly to firm up. Then repeat the process: dip in egg whites and coat with breadcrumbs again.
Chill until ready to cook.
Step 4: Cooking the Kotlets
There are a few options for cooking the kotlets.
Oven-Baked
Preheat the oven to 400°F (200°C).
Brush the kotlets with oil, ensuring most of the surface is coated. Place them on a wire rack and bake for 20–30 minutes, or until fully cooked and golden brown.
Pan-Fried
Heat 3 tablespoons of oil in a frying pan over medium heat. Once the oil is hot, carefully place the kotlets in the pan and fry for 4–5 minutes per side. Flip them frequently to ensure even cooking and browning.
Pan-Fried & Finished in the Oven
Preheat the oven to 400°F (200°C).
Brown the kotlets on all sides for 1–2 minutes, turning occasionally until they develop a golden, crispy crust. Transfer them to a baking sheet and finish cooking in the oven for 20–30 minutes, or until fully cooked and golden brown.
What Goes Well With Chicken Kiev Kotlets
Tips and Wisdom from Cafe Osharak
More Recipes to Try from Cafe Osharak
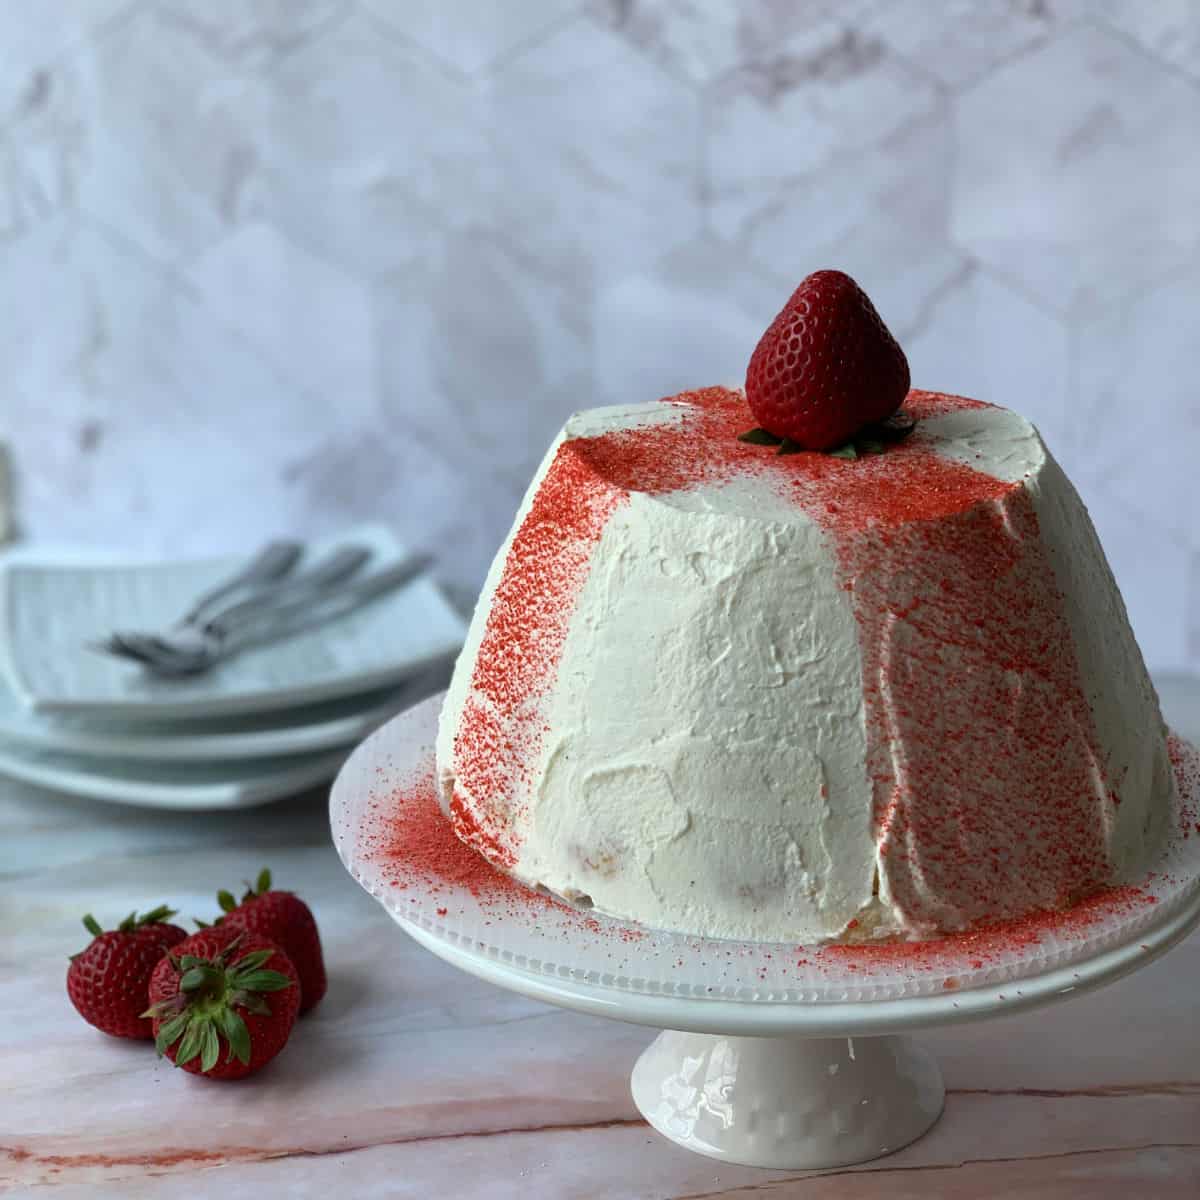
I hope you enjoyed making this as much as I did! For more inspiration and entertainment menu ideas, don’t forget to check out Roman Semolina Gnocchi and Oyster Mushroom Potato Gratin – they’re the perfect addition to your recipe collection.
These are the other Armenian mains that share the same comfort and the same generosity.


Family Favorite Chicken Kiev Kotlet
Ingredients
- 2 pounds chicken boneless thighs and breast grounded
- 1 onion medium size, grounded or shredded
- 2 garlic cloves minced
- 1 teaspoon paprika
- ½ teaspoon curry
- ½ teaspoon turmeric
- 1 teaspoon salt
- ½ teaspoon black pepper
- 1 egg
- 1 cup breadcrumbs
- 2 eggs
- 3 cup breadcrumbs or more
- 100 grams butter
- 10 grams cranberries fresh and frozen
Instructions
Prepare the Chicken Mixture
- Grind chicken, onion, and garlic.
- Mix in spices, egg, and breadcrumbs.
- Chill for 30 minutes.
Compound Butter
- Blend the soften butter and cranberries together.
- Spread the butter on a saran wrap and form a square block. Chill in the fridge.
- Cut into thumb size bars and keep cold until ready to use.
Shape the Kotlets
- Divide into 10-12 equal balls, approximately 100g each.
- Flatten into oval patties on a breadcrumb-covered surface.
- Place a piece of chilled compound butter in the center, arrange a reserved bone if using, and seal into a torpedo shape.
- Chill the kotlet for 15 minutes to hold the shape.
Coat
- Dip each kotlet in foamy eggs, then coat with breadcrumbs.
- Chill for at lease 20 minutes or freeze to help them hold their shape.
Oven-Baked
- Preheat oven to 400°F(200°C)
- Brush the kotlet with oil and place on wire rack
- Bake in the oven for 20-30 minutes until golden brown.
Pan Fried
- Heat 3 tbsp oil in a pan over medium heat. Fry kotlets for 4–5 minutes per side, flipping frequently for even browning.
Pan-Fried & Oven-Finished
- Preheat oven to 400°F (200°C). Brown kotlets in a pan for 1–2 minutes per side, then transfer to a baking sheet and bake for 20–30 minutes until fully cooked.