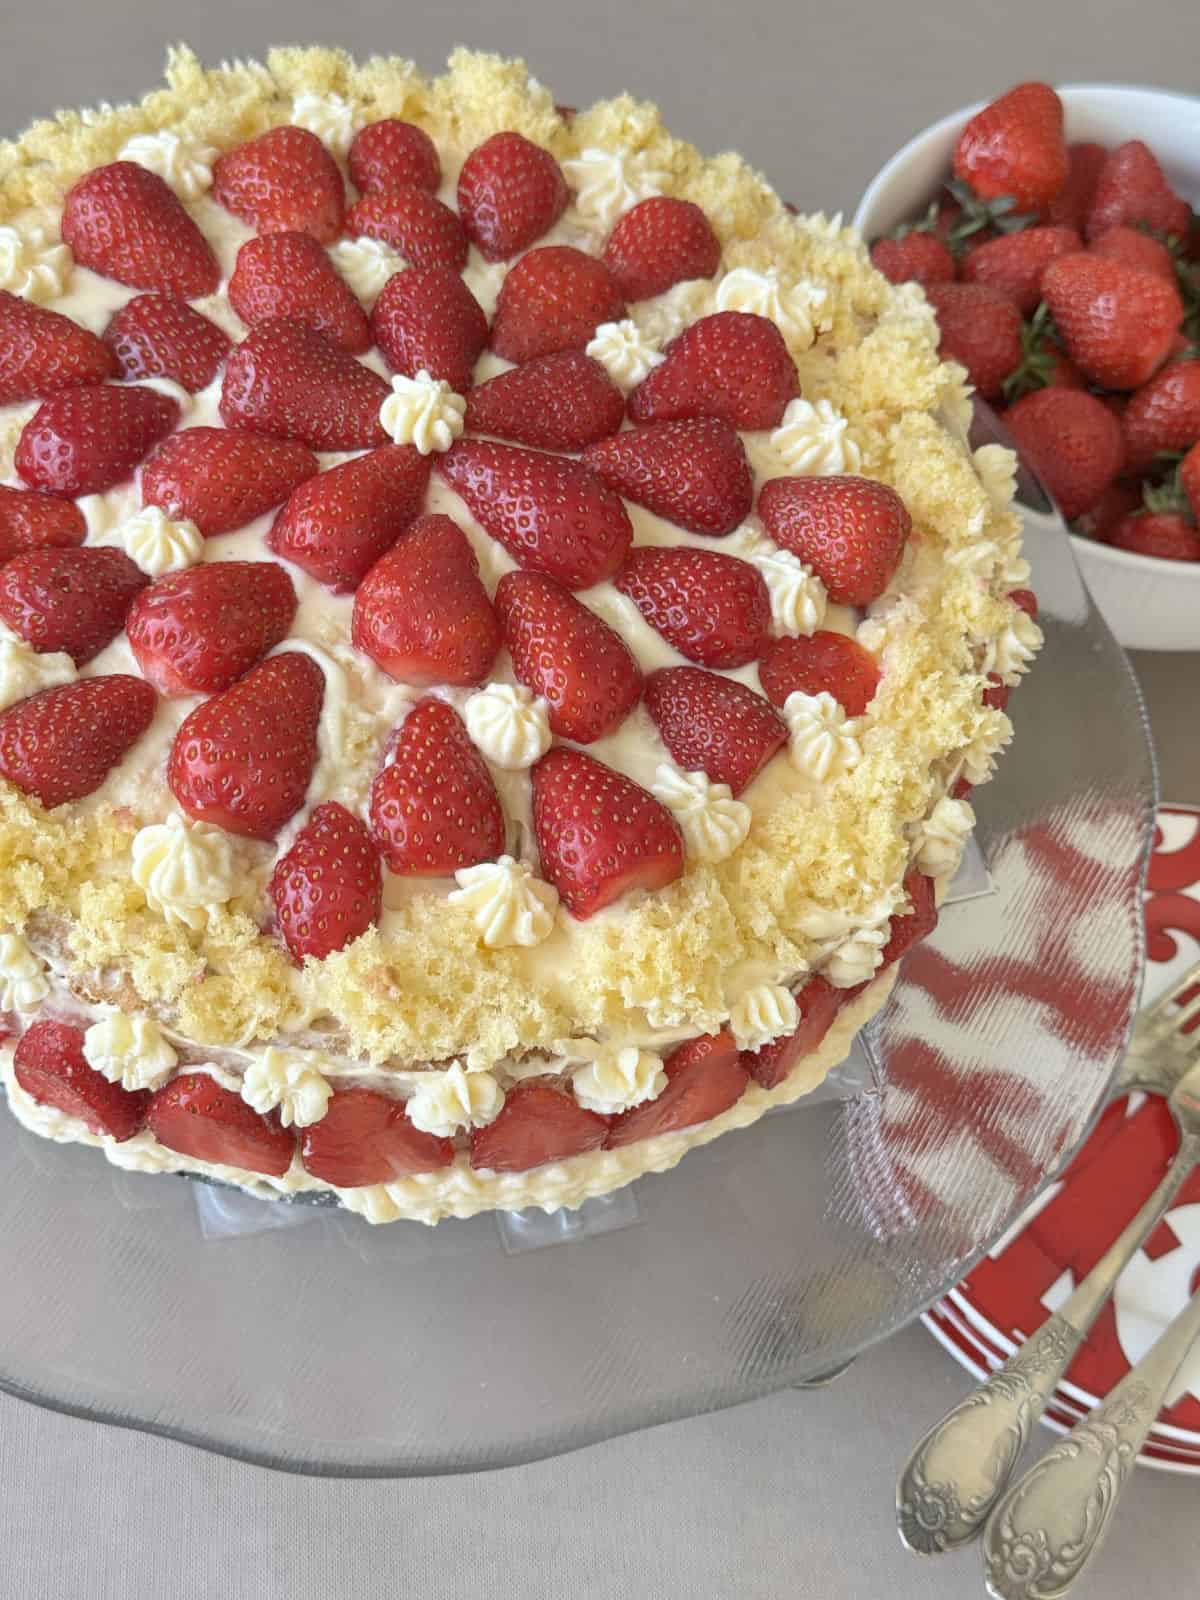
Strawberry Cake – Easy Le Fraisier

This post may contain affiliate links. As an Amazon Associate, I earn from qualifying purchases. See my Affiliate Disclosure .
Strawberries are the first sweet sign that the warm days of Summer are here. You start craving bright, fresh desserts that feel as light as the breeze – soft, airy, and never too heavy. This strawberry cake delivers exactly that: layers of delicate sponge, silky crème mousseline, and juicy strawberries in every forkful. It’s light, cooling, and bursting with the flavor of the season.
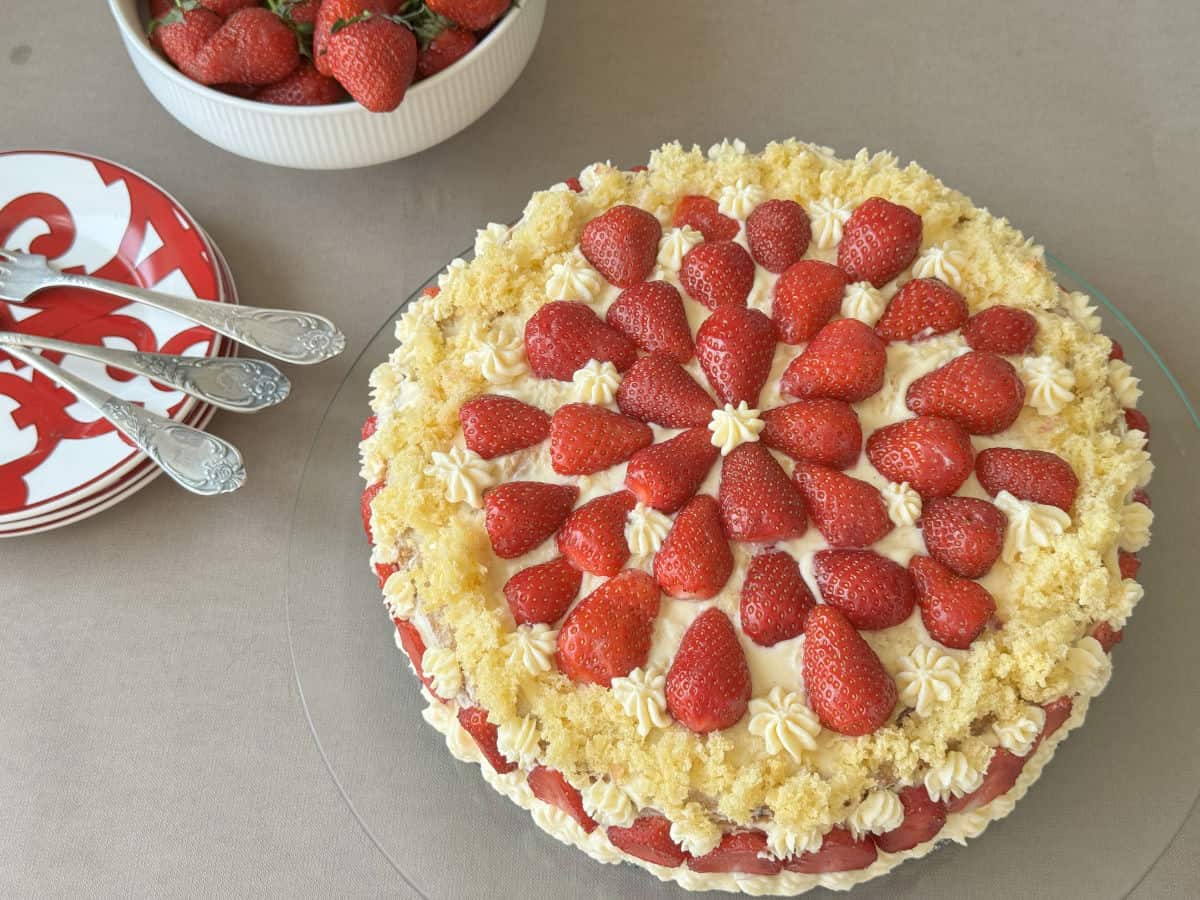
Table of Contents
Chronicles of Strawberry Cake
As soon as the markets overflowed with fragrant, ruby-red strawberries, it was our family’s seasonal signal that: strawberry cake season had arrived. Every May, without fail, my mom would begin baking this cake on what felt like a weekly rhythm – each time slightly different, but always delicious. The kitchen would fill with the scent of vanilla sponge and sweet berries, and the table would be set just a little more special, even on ordinary afternoons.
This cake holds more than flavor – it carries memories. Every time I make it, it becomes a tribute to both my mother and my grandmother. The recipe itself, I believe, was my grandmother’s invention. It’s likely inspired by the elegant English trifle, but made humbler, more rustic, and deeply personal. She even placed a special order to have a thin cake pan made, just so she could bake the sponge on a kerosene cooking stove.
The cake always had a wow factor – the moment it was sliced, each piece revealed the hidden layers of delicate sponge crumbs, juicy berries, and luscious cream.
What’s Great About This Recipe
Unlike many strawberry cakes that rely on gelatin or food coloring, this one is fruit-forward, showcasing real strawberries in both the batter and the frosting.
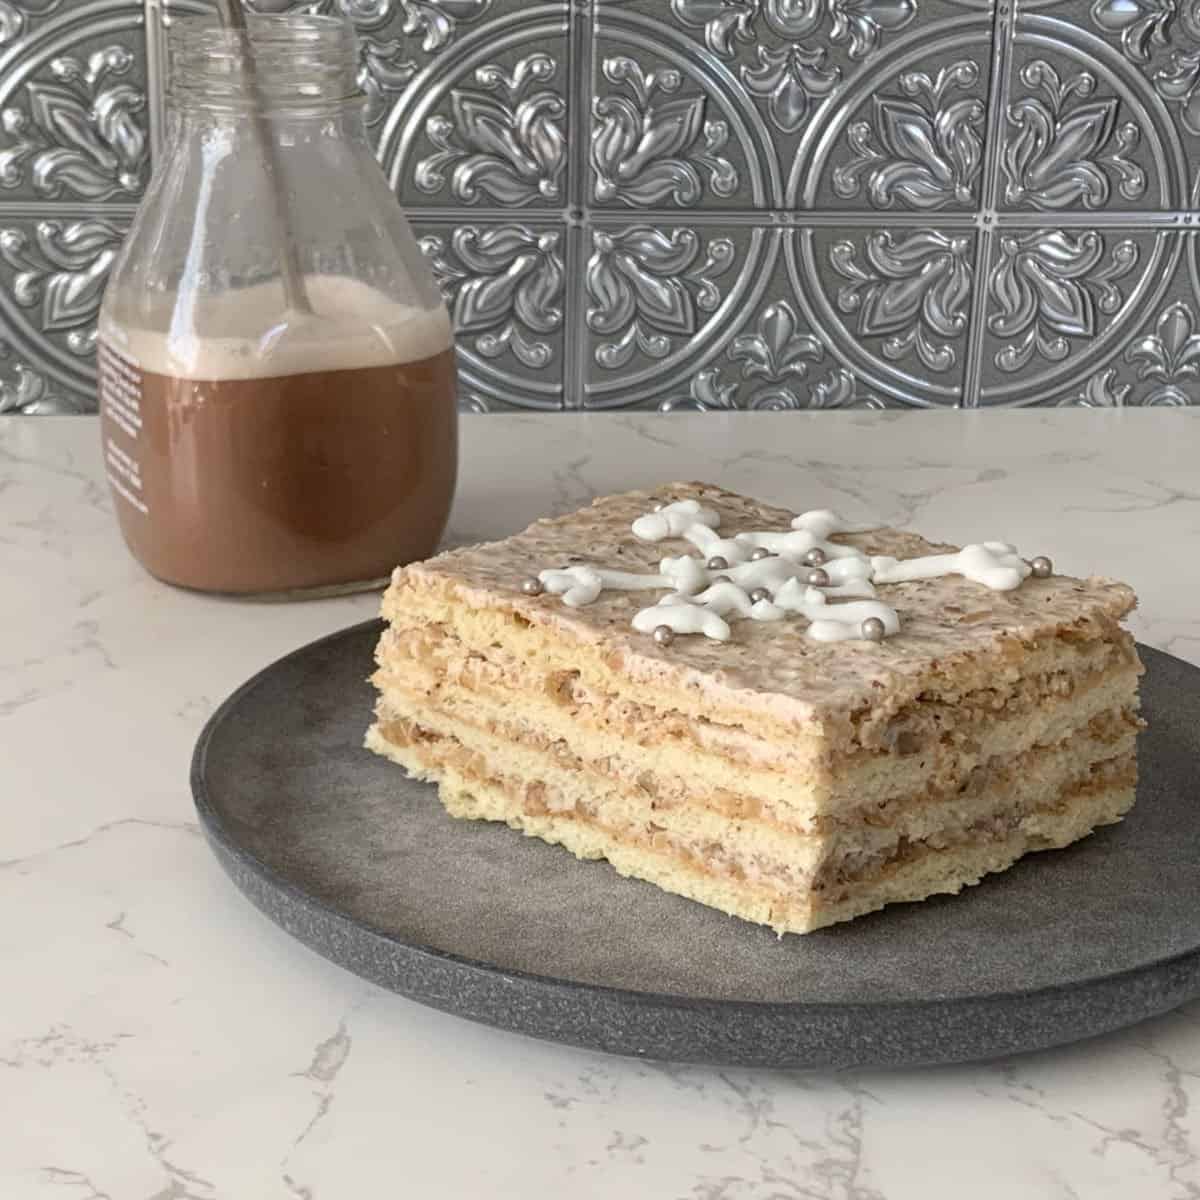
For a show-stopping occasion cake, consider my Black Forest Gateau – it’s rich, chocolatey, and dramatic, while this strawberry cake is more subtle and breezy.
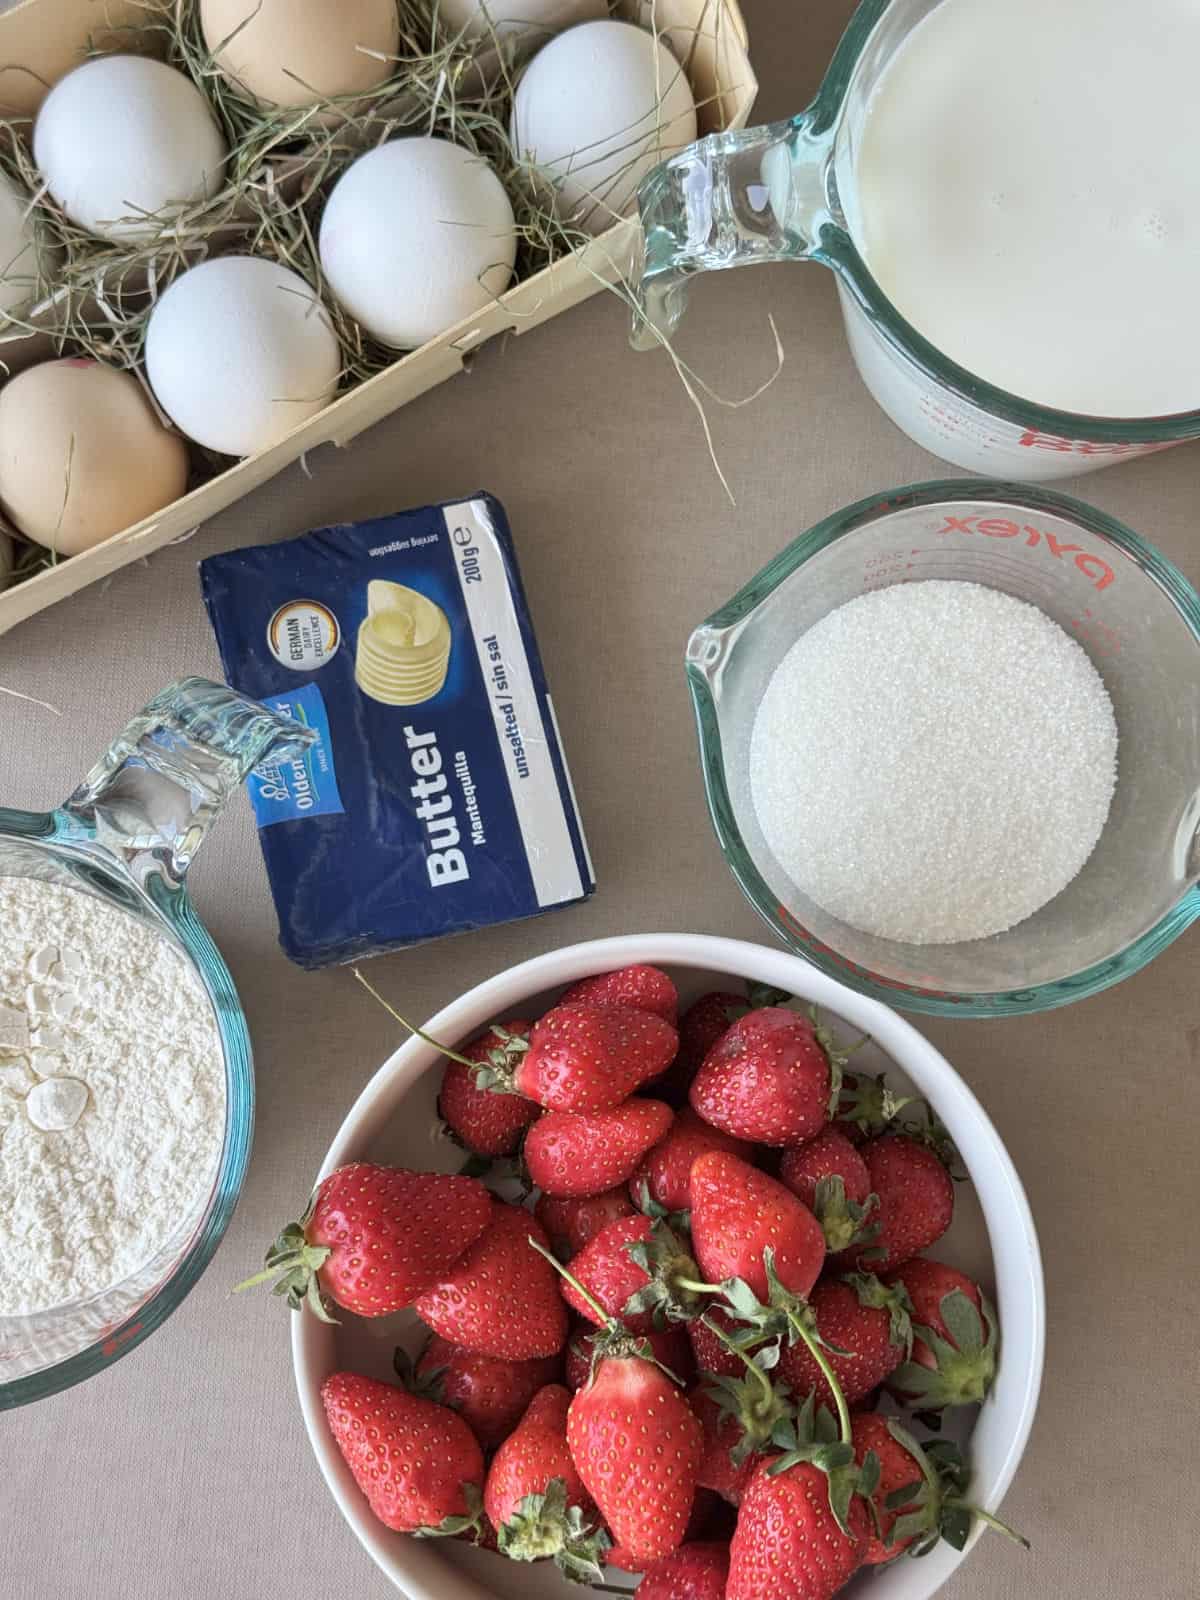
Essential Grocery List and Ingredient Notes
Time Required:
Bake in a 350°F (175°C) preheated oven.
Special Tools to Use:
How to Make Strawberry Cake
Step 1: Preparing the Sponge Cake
Preheat the oven to 350°F (175°C).
Cut a round piece of parchment paper to fit the bottom of your pan. Place it inside and grease only the parchment, not the sides of the pan.
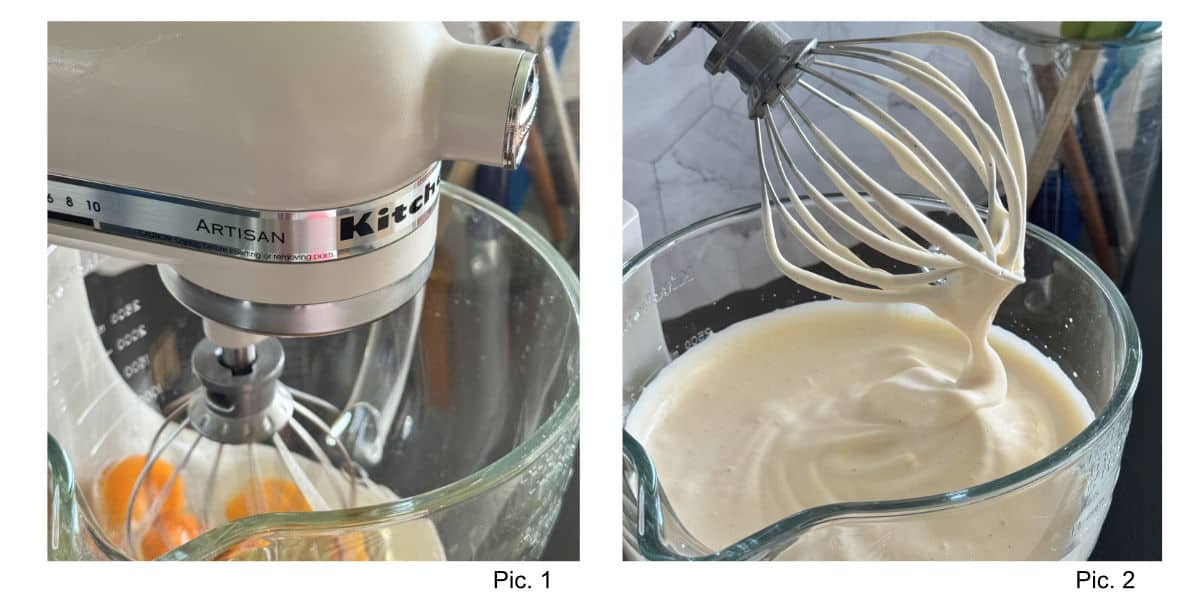
Crack the eggs into a clean stand mixer bowl (Pic. 1).
Add all the sugar at once to the eggs, and immediately start whisking on low speed to begin dissolving the sugar.
Once sugar is partially dissolved, increase speed to maximum and beat with the balloon whisk attachment until the mixture has tripled or quadrupled in volume (Pic. 2).
Add the vanilla extract and mix briefly to combine.
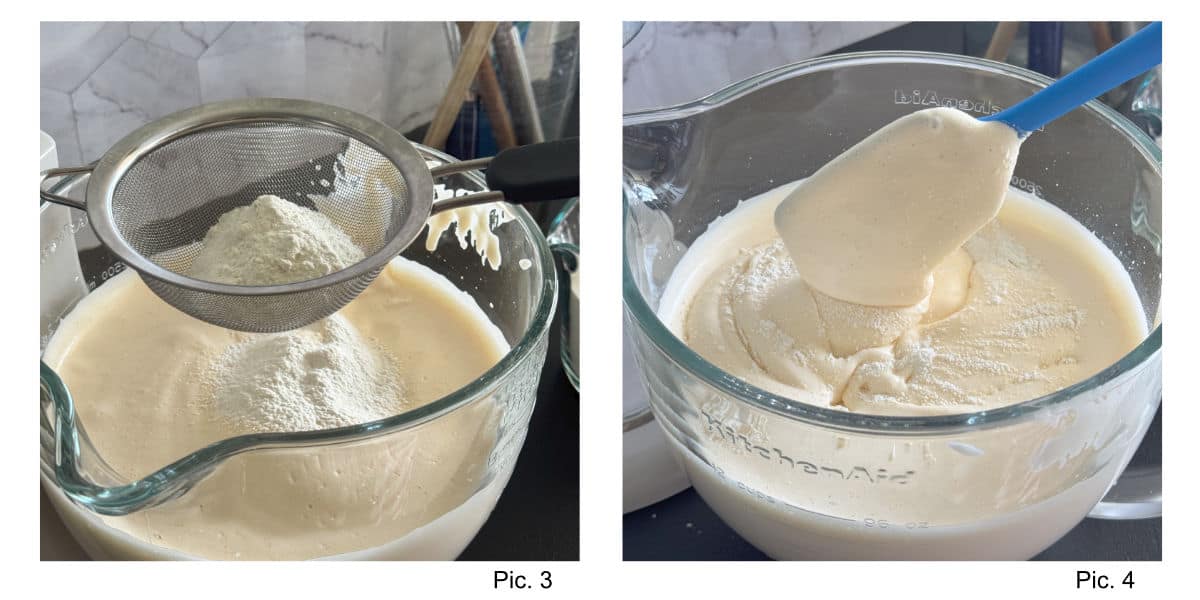
Sift the flour and cornstarch together. Add the dry ingredients in two additions, sifting them over the egg mixture each time (Pic. 3).
Fold gently using a rubber spatula after each addition, being careful not to deflate the batter (Pic. 4). Mix until no visible streaks of flour remain.
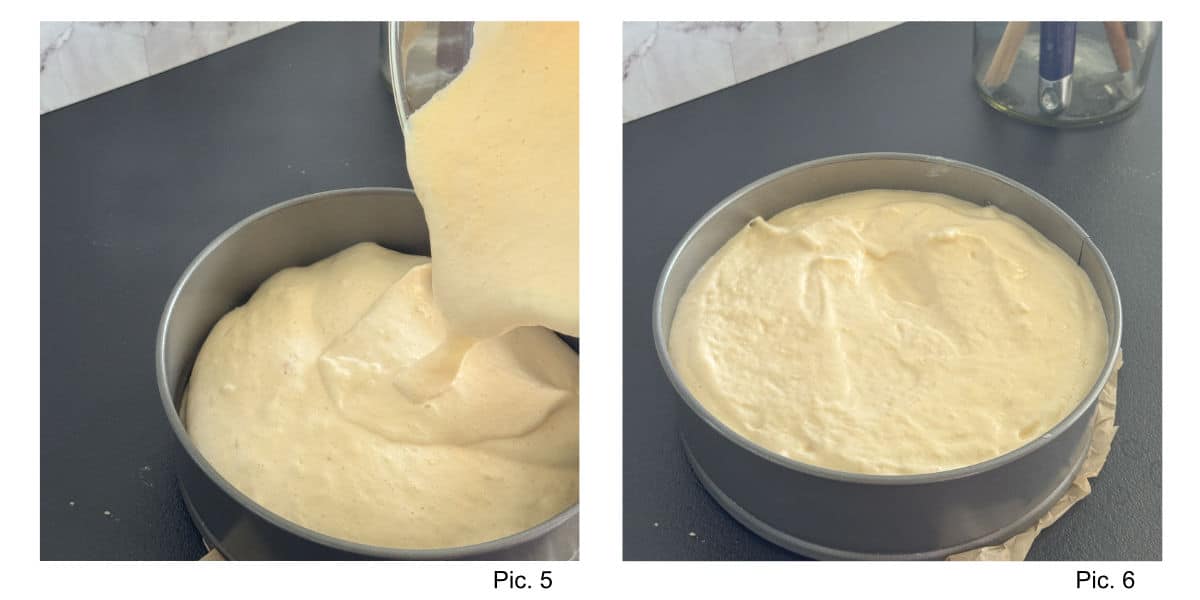
Pour the batter into the prepared pan (Pic. 5 & 6) and place it immediately into the center rack of the oven.
Bake for 40-45 minutes or until a toothpick inserted into the center comes out clean.
Do not open the oven door for the first 30 minutes!
Once done, let the cake cool in the pan. Use a knife to carefully loosen the sides before removing it.
Step 2: Preparing the Mousseline Cream
In a saucepan, bring the milk to a boil over medium heat. Meanwhile, whisk the egg yolks with sugar and cornstarch in a separate bowl until smooth.
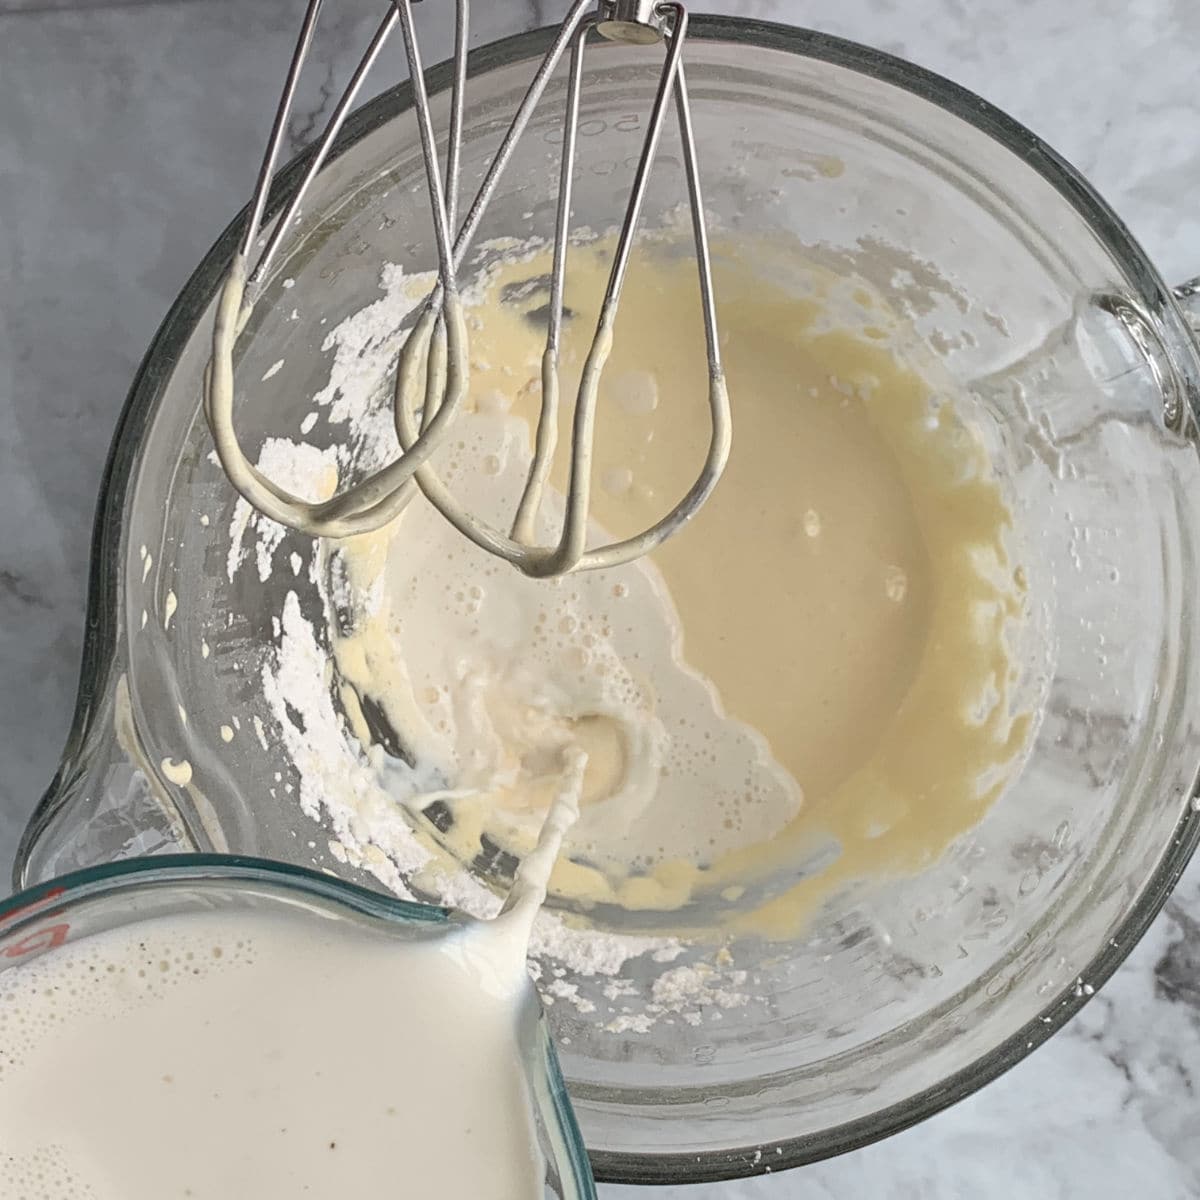
Temper the yolk mixture by slowly adding a small amount of hot milk while whisking constantly. Gradually pour in the remaining milk, continuing to stir.
Return the mixture to the pan and cook over medium-low heat, stirring constantly with a wooden spoon, scraping the bottom and sides to avoid lumps.
Once the cream thickens, remove from heat, add vanilla extract, and place the pan in a cold water bath, stirring occasionally until fully cooled.
In a mixing bowl, cream the butter and cream cheese together until light and fluffy.

Add the cooled custard (caster) one spoonful at a time, beating after each addition until the buttercream is smooth and fully incorporated.
Step 3: Preparing the strawberries
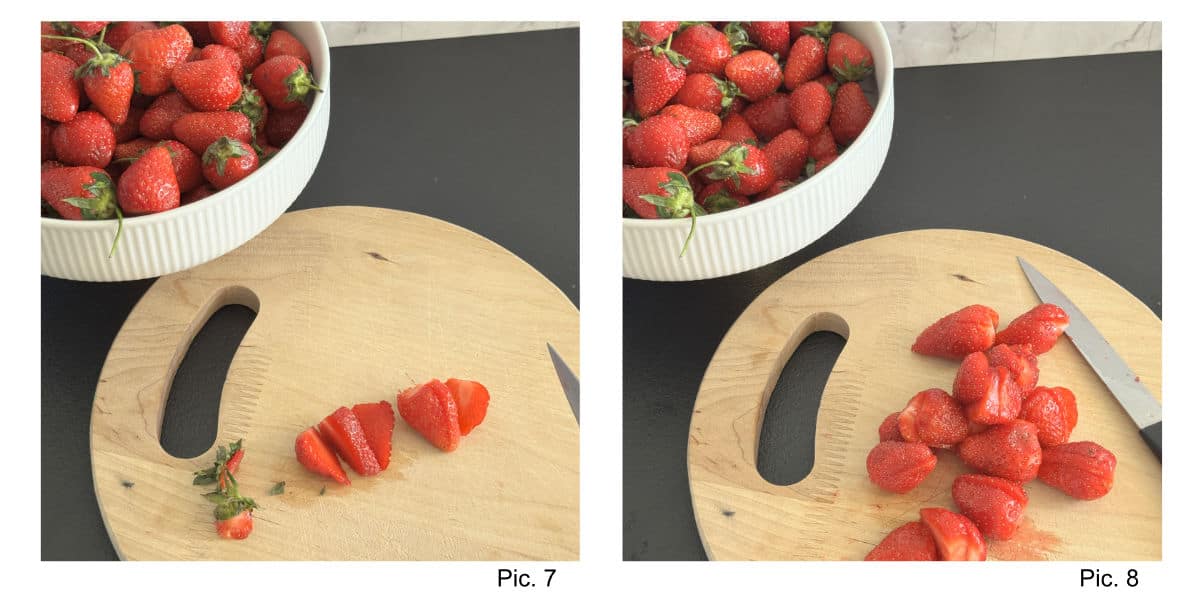
Wash and slice the strawberries, keeping a few whole for decoration. Set aside some buttercream for finishing (Pic. 7 & 8).
Step 4: Assemble the Cake

Once the cake is cooled, remove from the baking pan (Pic. 9), and place it on a cooling rack.
Using a paring knife, score a circle across the perimeter of the cake about ½ inch from the rim of the cake, going about ¾ of the way deep (Pic. 10).
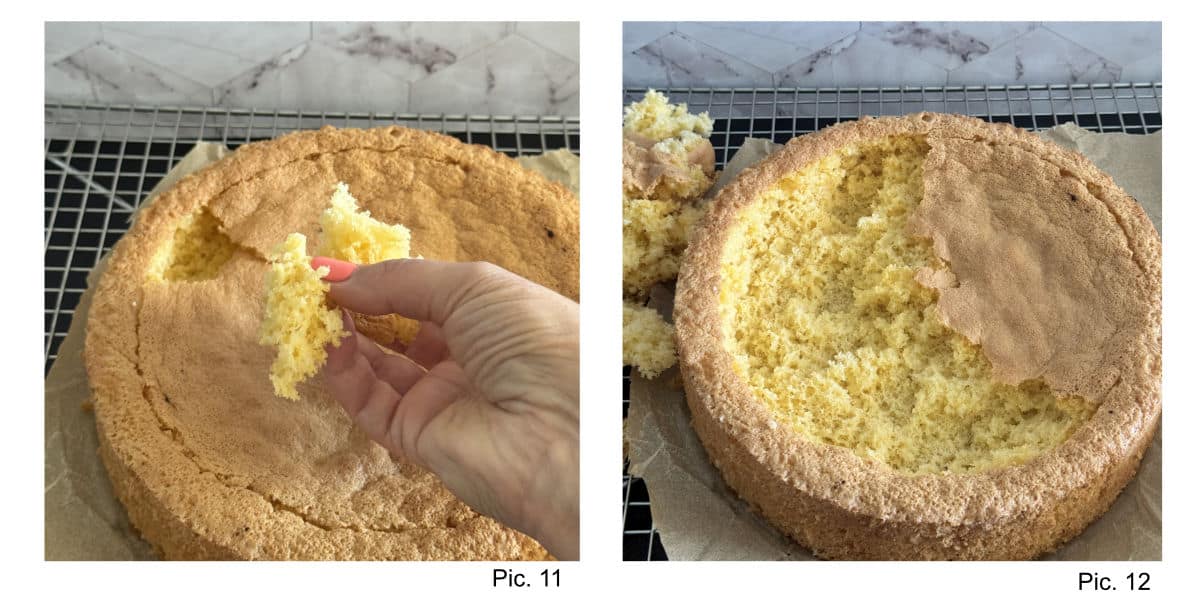
Cut a circular trench inside the cake and begin to remove chunks of the sponge carefully, creating a cavity (Pic. 11 & 12).
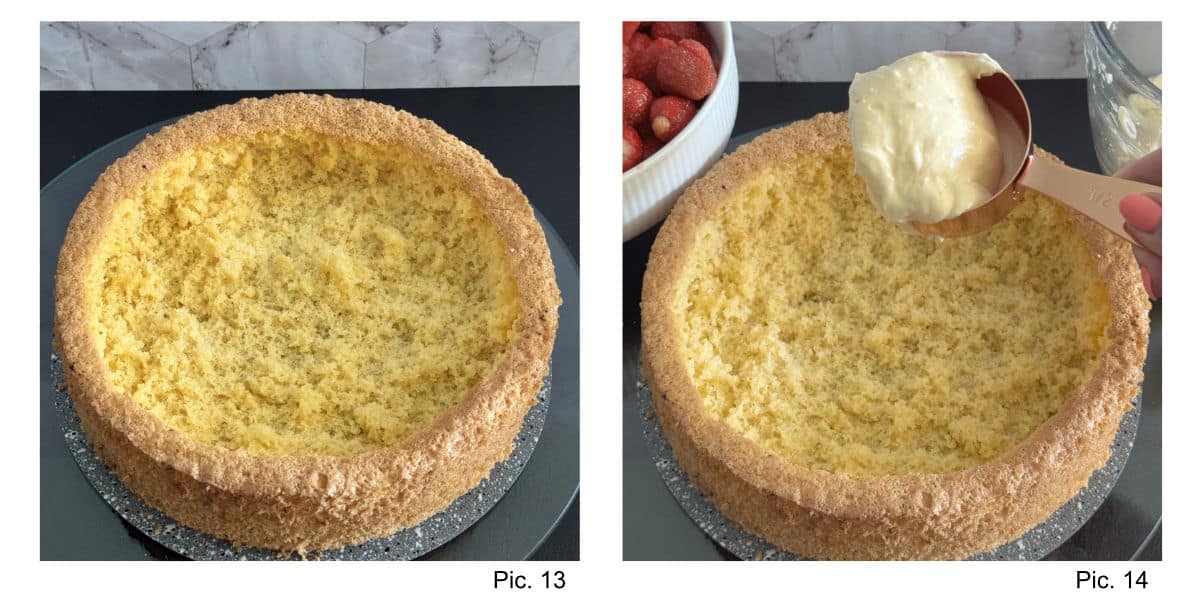
Leave about ½ inch of cake around the sides and bottom (Pic. 13).
Spread a layer of buttercream inside the cavity (Pic. 14).
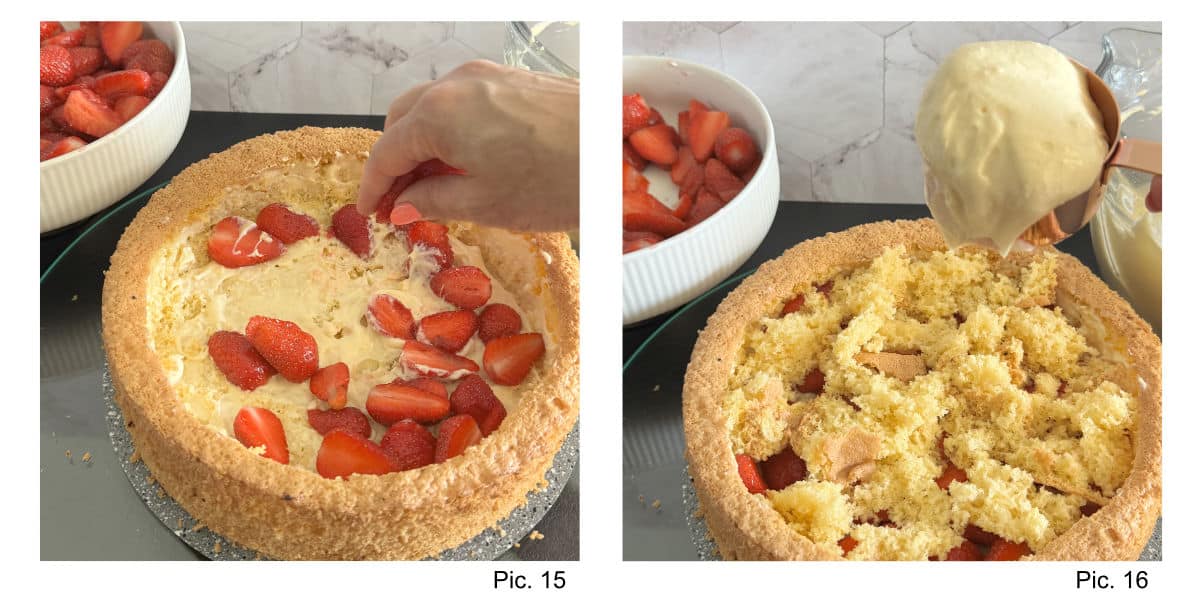
Arrange ⅓ of the sliced strawberries in the bottom of the cavity (Pic. 15). Top with a layer of the reserved cake crumbs (Pic. 16).
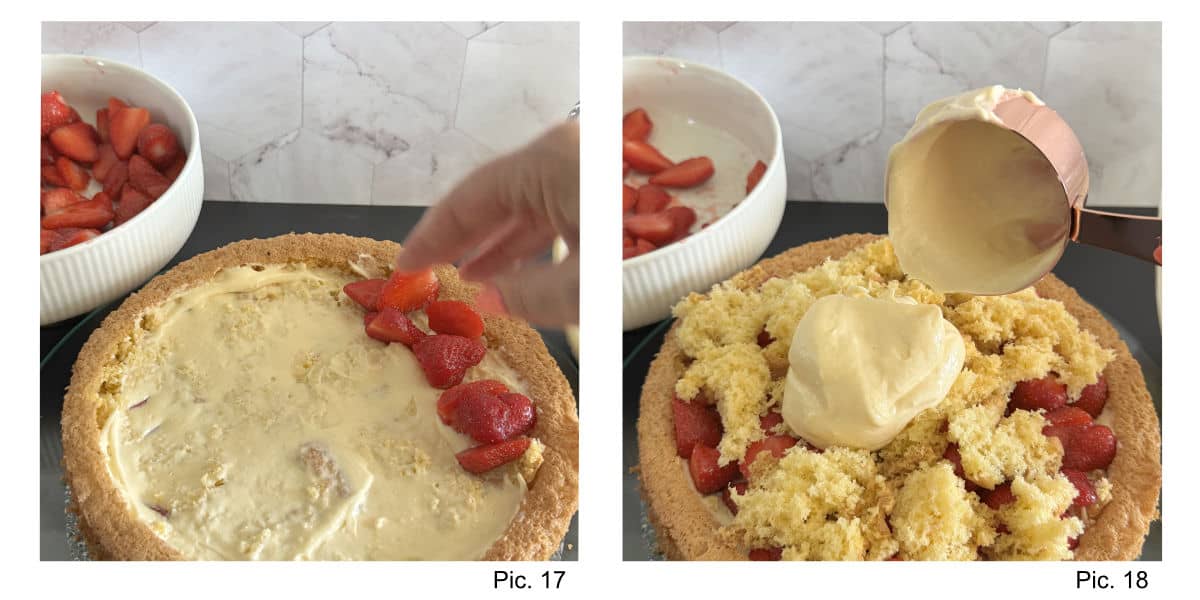
Spread more buttercream over the crumbs and repeat the process: add strawberries and then more crumbs.
Once filled and rebuilt, cover the top and sides with the reserved buttercream.
Decorate with whole and sliced strawberries.
Refrigerate the cake for at least 3 hours before serving to allow the flavors and structure to set.
Best Way to Serve the Cake
This strawberry cake is showstopper dessert on its own, but with a few simple additions, you can turn it into a truly elegant dessert.
Tips and Wisdom from Cafe Osharak
Frequently Asked Questions
Can you make the sponge cake ahead?
Absolutely. In fact, a sponge baked a day in advance holds its structure better and absorbs fillings or cream more evenly. Just make sure it’s completely cooled before wrapping and storing at room temperature or in the fridge. This extra time gives the cake even more tenderness and flavor.
What kind of frosting pairs best with strawberry cake?
A classic vanilla buttercream or a whipped cream cheese frosting complements it beautifully. My preference is usually the mousseline cream that is smooth and silky and pairs nicely with strawberries.
More Recipes That Use Mousseline Cream
Le Fraisier is built on mousseline cream – and once you have made it, the technique opens other doors. These are the recipes that share the same foundation, or the same spirit of French and Italian pastry made at home.
More Recipes to Try from Cafe Osharak

Strawberry Cake – Easy Le Fraisier

Ingredients
For the Sponge Cake
- 6 eggs
- 180 g sugar
- 145 g all-purpose flour
- 35 g cornstarch
- A pinch of salt
- Vanilla paste
For the Crème Mousseline (Buttercream)
- 2 egg yolks
- 2 cups milk
- 2 tablespoons cornstarch
- 1 cup sugar
- 200 g unsalted butter softened
For the Filling
- 1 kg fresh strawberries
Instructions
Baking the Cake
- Preheat the oven to 350°F (175°C).
- Prepare the baking pan: Line the bottom with a parchment round and grease only the parchment, not the sides.
- Crack the eggs into a clean stand mixer bowl.
- Add all the sugar and start whisking on low speed to begin dissolving the sugar.
- Once slightly dissolved, increase to high speed and whisk with a balloon whisk attachment until the mixture triples or quadruples in volume.
- Add the vanilla paste and mix just to combine.
- Sift the flour and cornstarch together, then add them in two additions, folding gently with a rubber spatula after each.
- Fold just until no flour streaks remain, taking care not to deflate the batter.
- Pour the batter into the prepared pan and bake immediately on the center rack.
- Bake for 35-40 minutes or until a toothpick inserted in the center comes out clean.
- ***Do not open the oven door for the first 30 minutes.
- Cool the cake in the pan, then loosen the sides with a knife before removing.
Making the Buttercream (Crème Mousseline)
- In a saucepan, bring the milk to a boil over medium heat.
- In a bowl, whisk the yolks with sugar and cornstarch until smooth.
- Temper the egg mixture by whisking in a small amount of the hot milk.
- Slowly pour in the rest of the milk, whisking constantly.
- Return to the saucepan and cook over medium-low heat, stirring constantly until thickened.
- Remove from heat, stir in vanilla, and cool in a cold water bath, stirring occasionally.
- In a stand mixer, cream the butter until light.
- Add the cooled custard spoon by spoon, beating well after each addition, until smooth.
Assembling the Cake
- Wash and slice the strawberries, reserving some whole for decoration. Set aside some buttercream for finishing.
- With a paring knife, make a vertical cut 1/2 inch from the rim, about 3/4 deep.
- Cut and scoop a cavity from the cake, leaving about 1/2 inch thickness around the bottom and sides.
- Spread a layer of buttercream inside the cavity.
- Add 1/3 of the strawberries, then top with some of the reserved cake crumbs.
- Repeat with another layer of buttercream, strawberries, and crumbs.
- Once filled, cover the entire cake with the reserved buttercream.
- Decorate with whole and sliced strawberries.
- Refrigerate for at least 3 hours before serving to let the cake set beautifully.